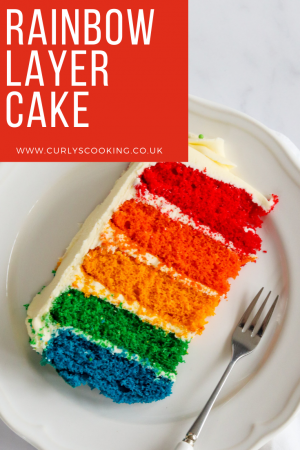
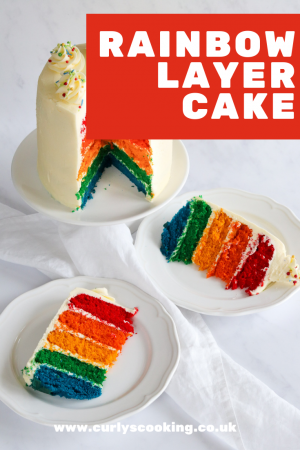
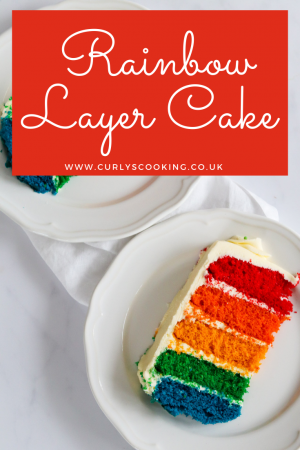
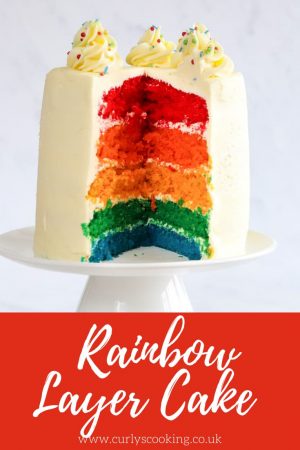
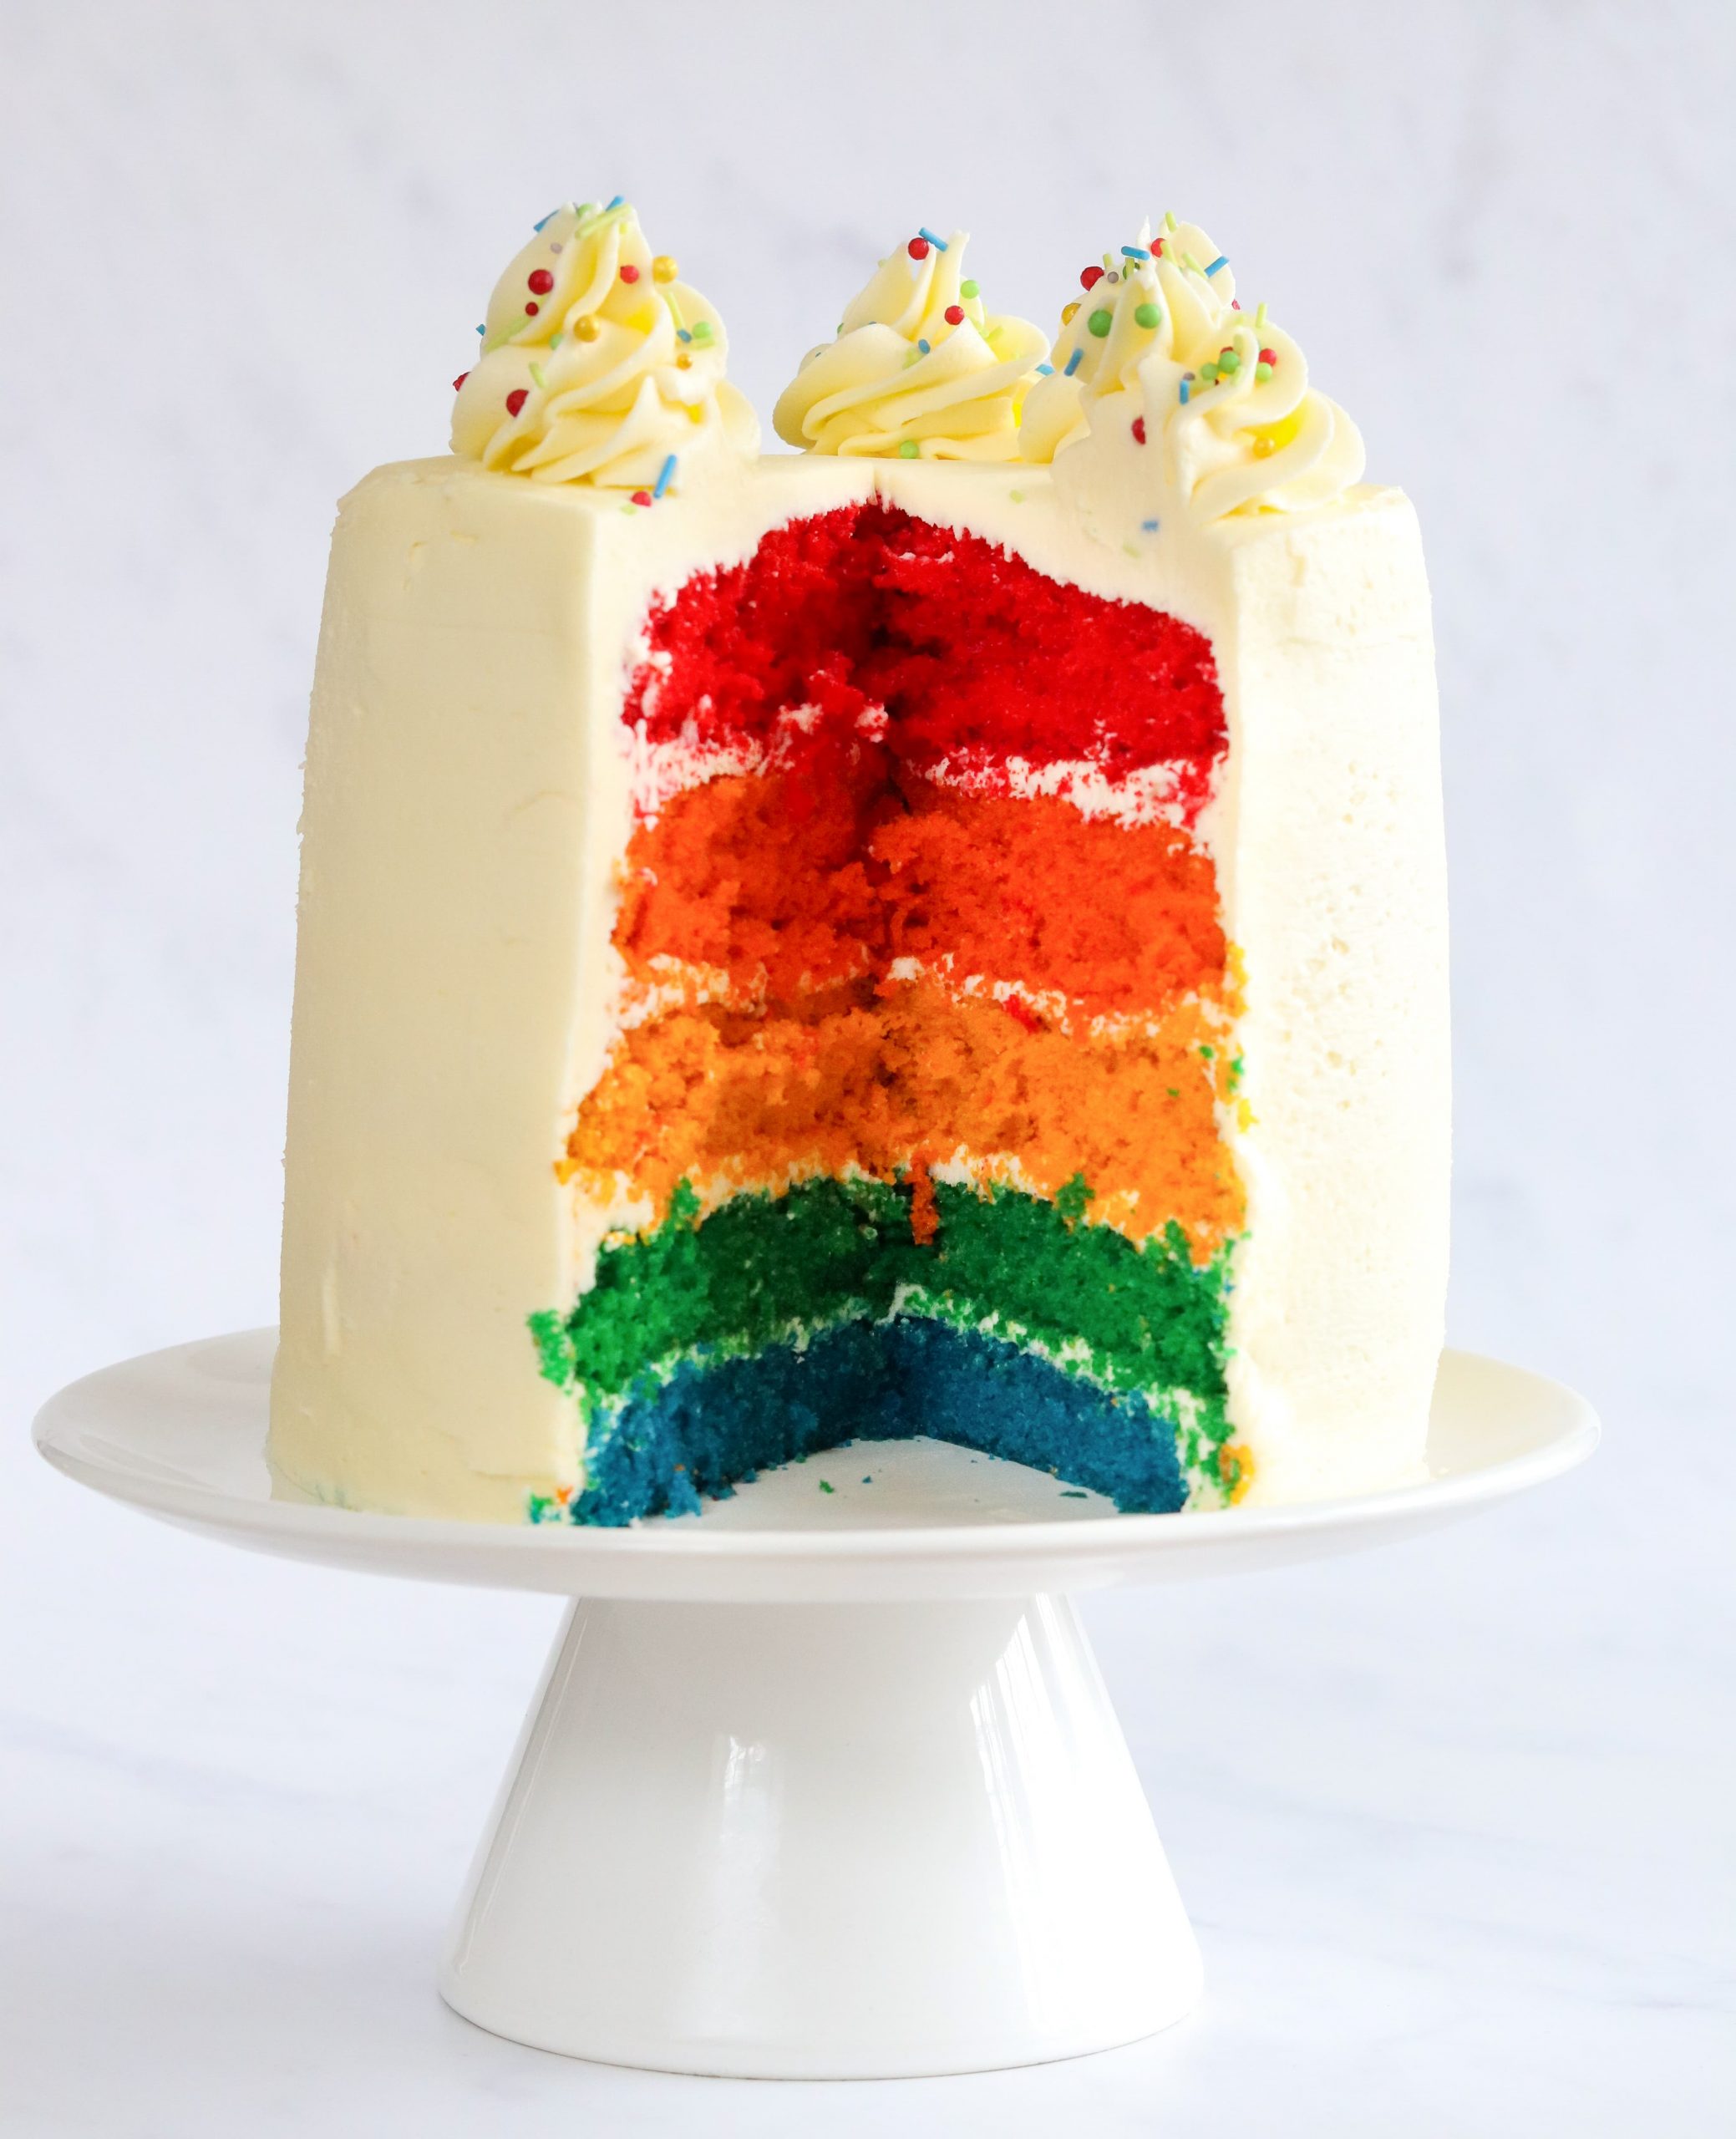
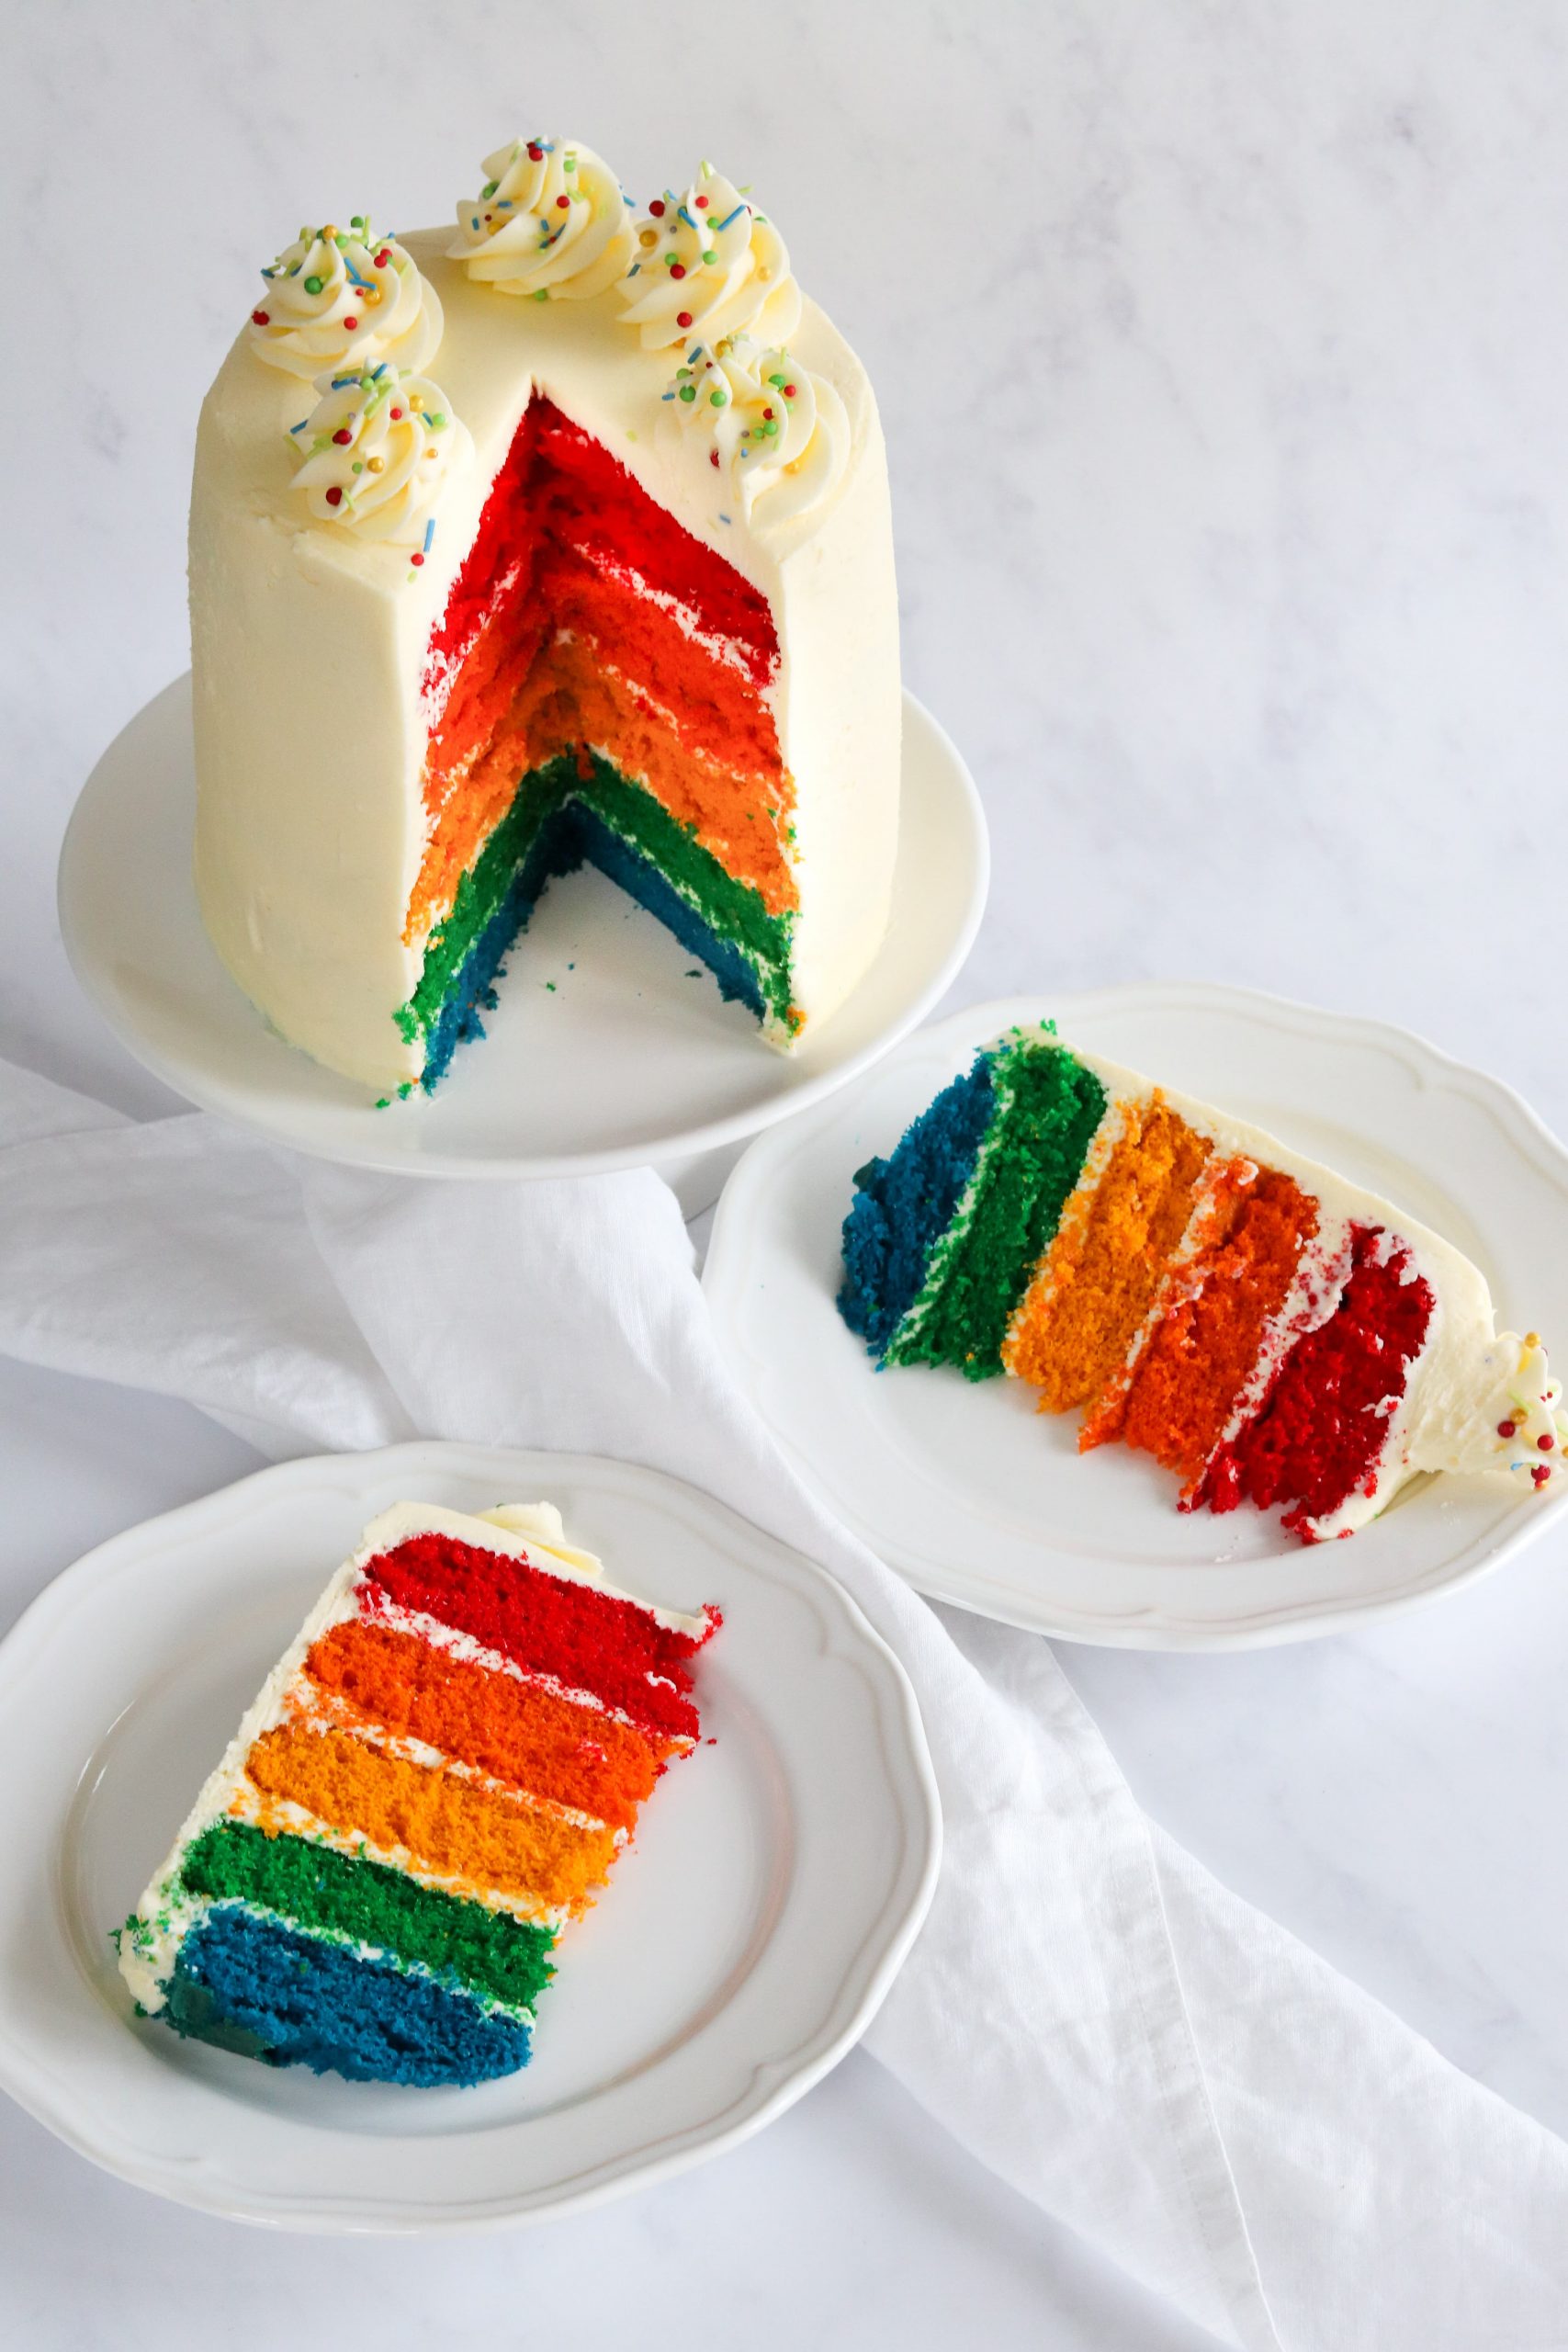
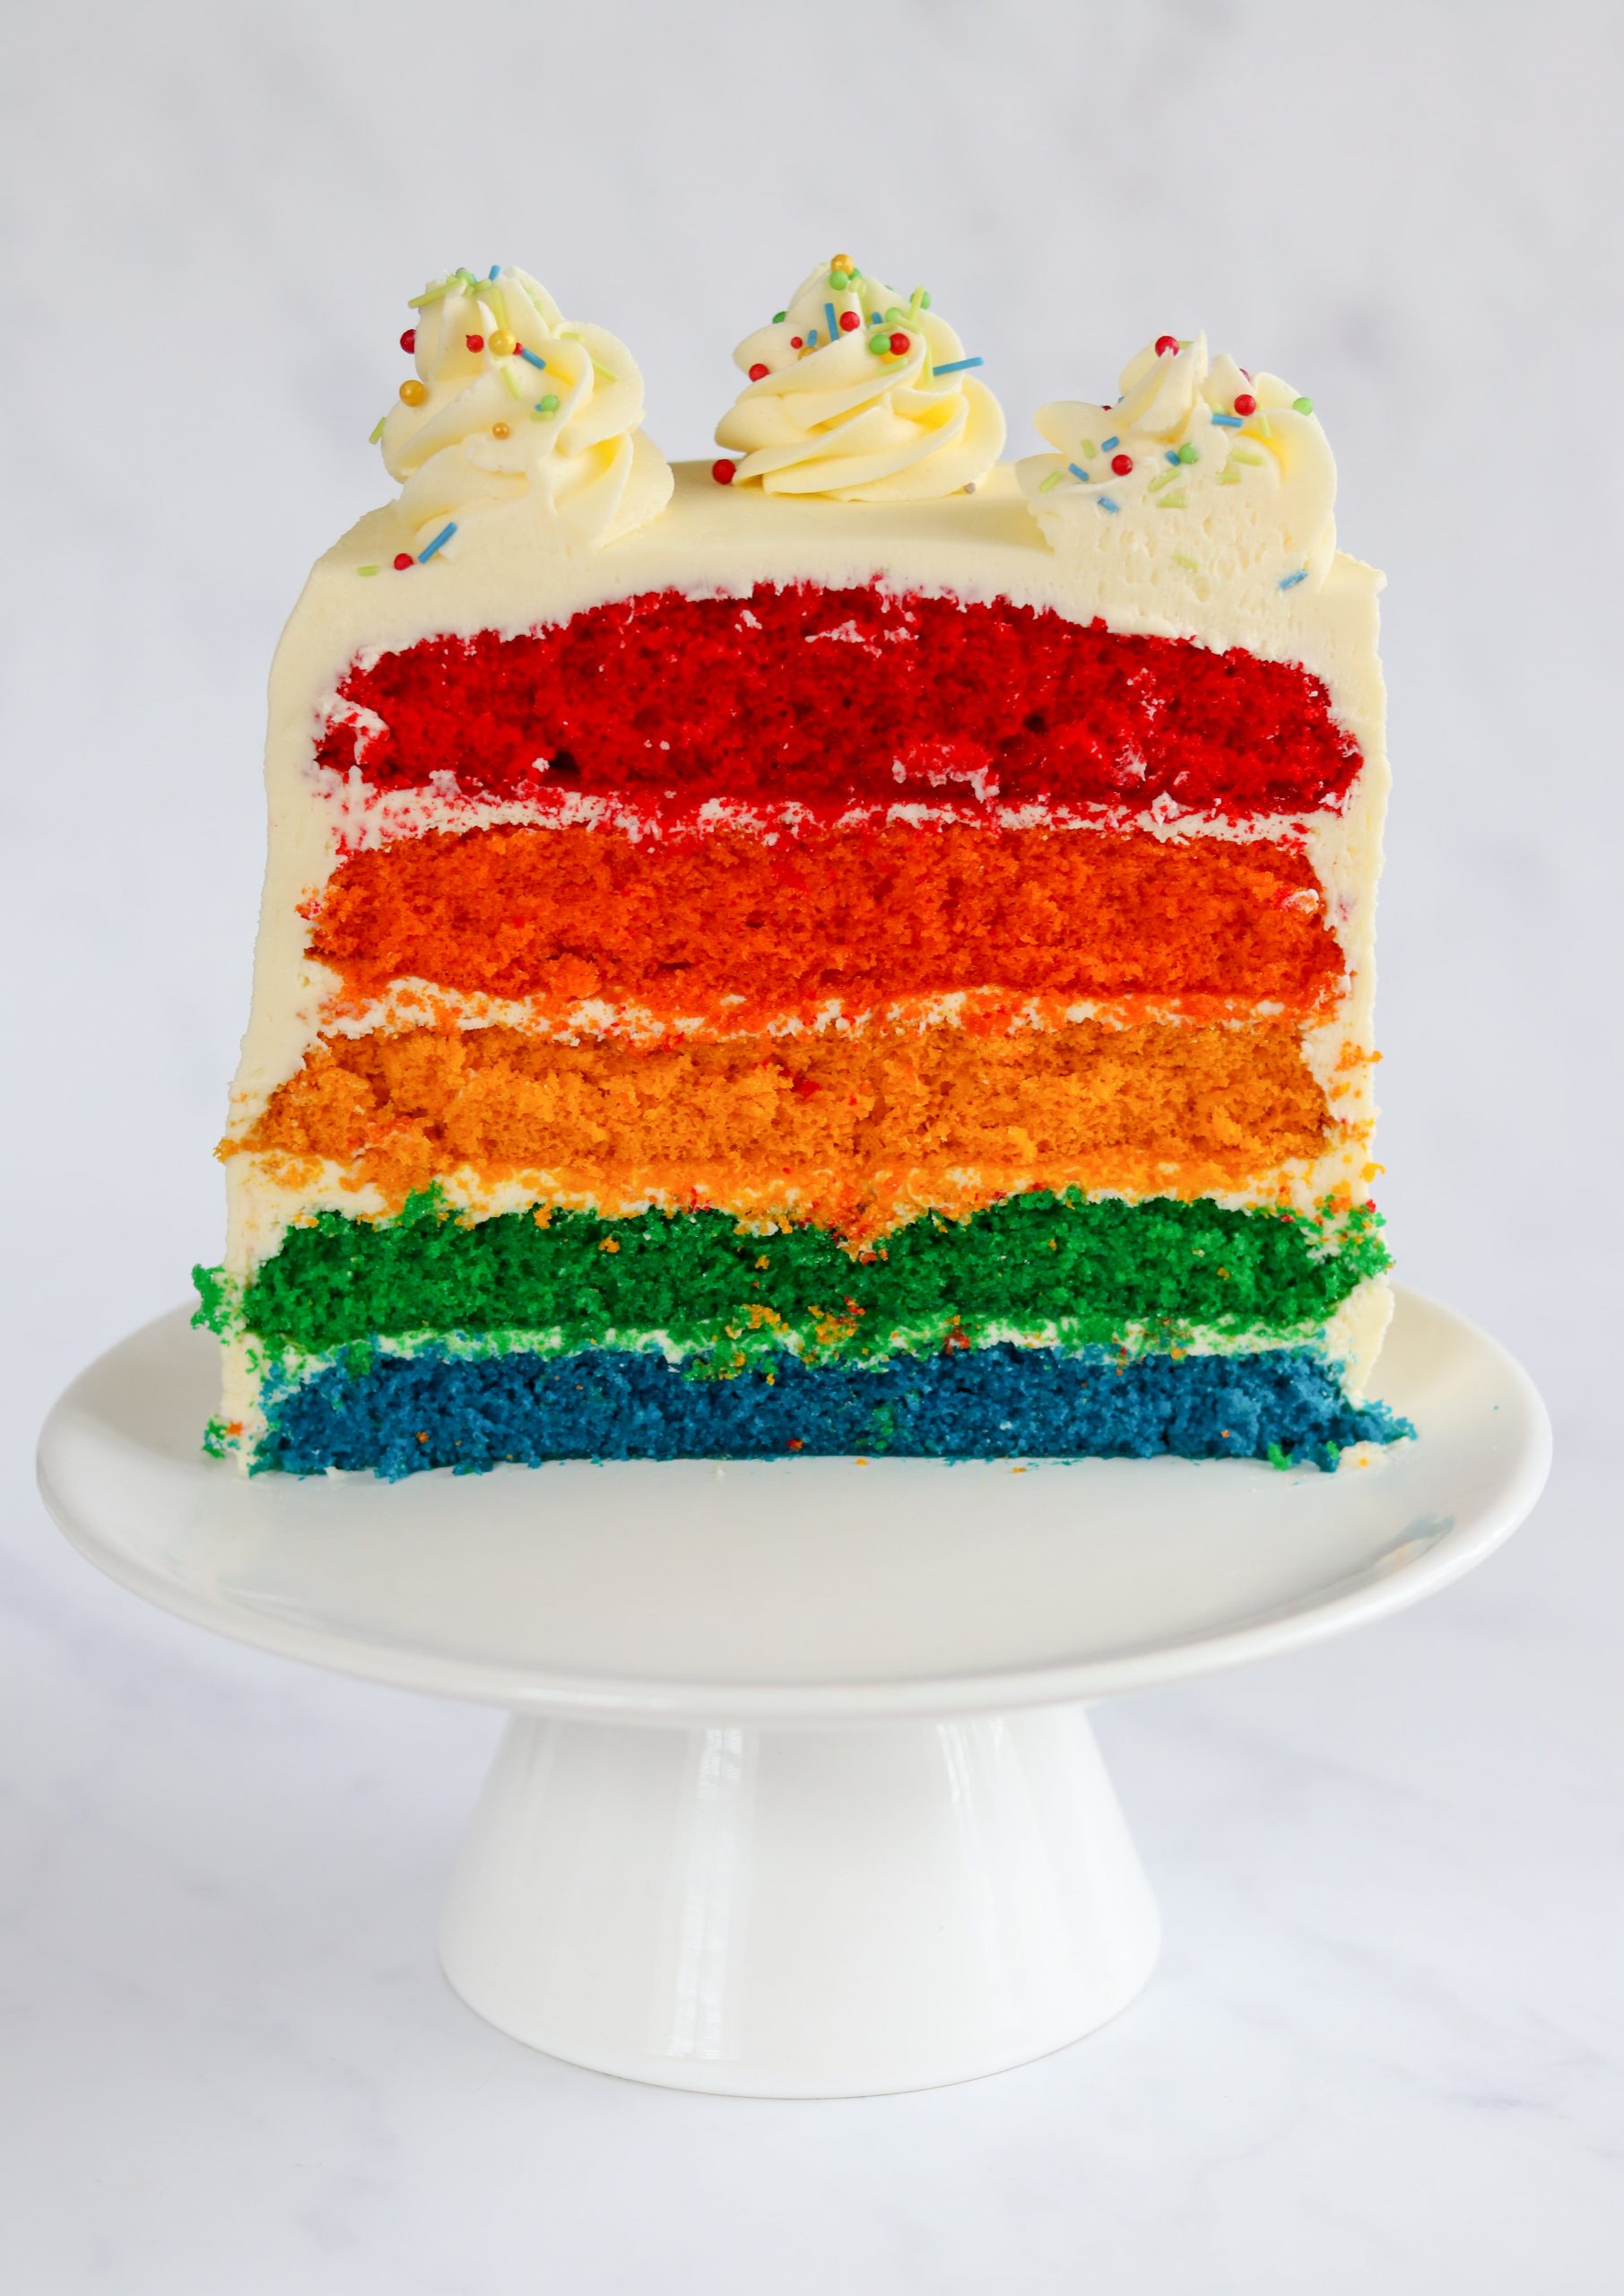
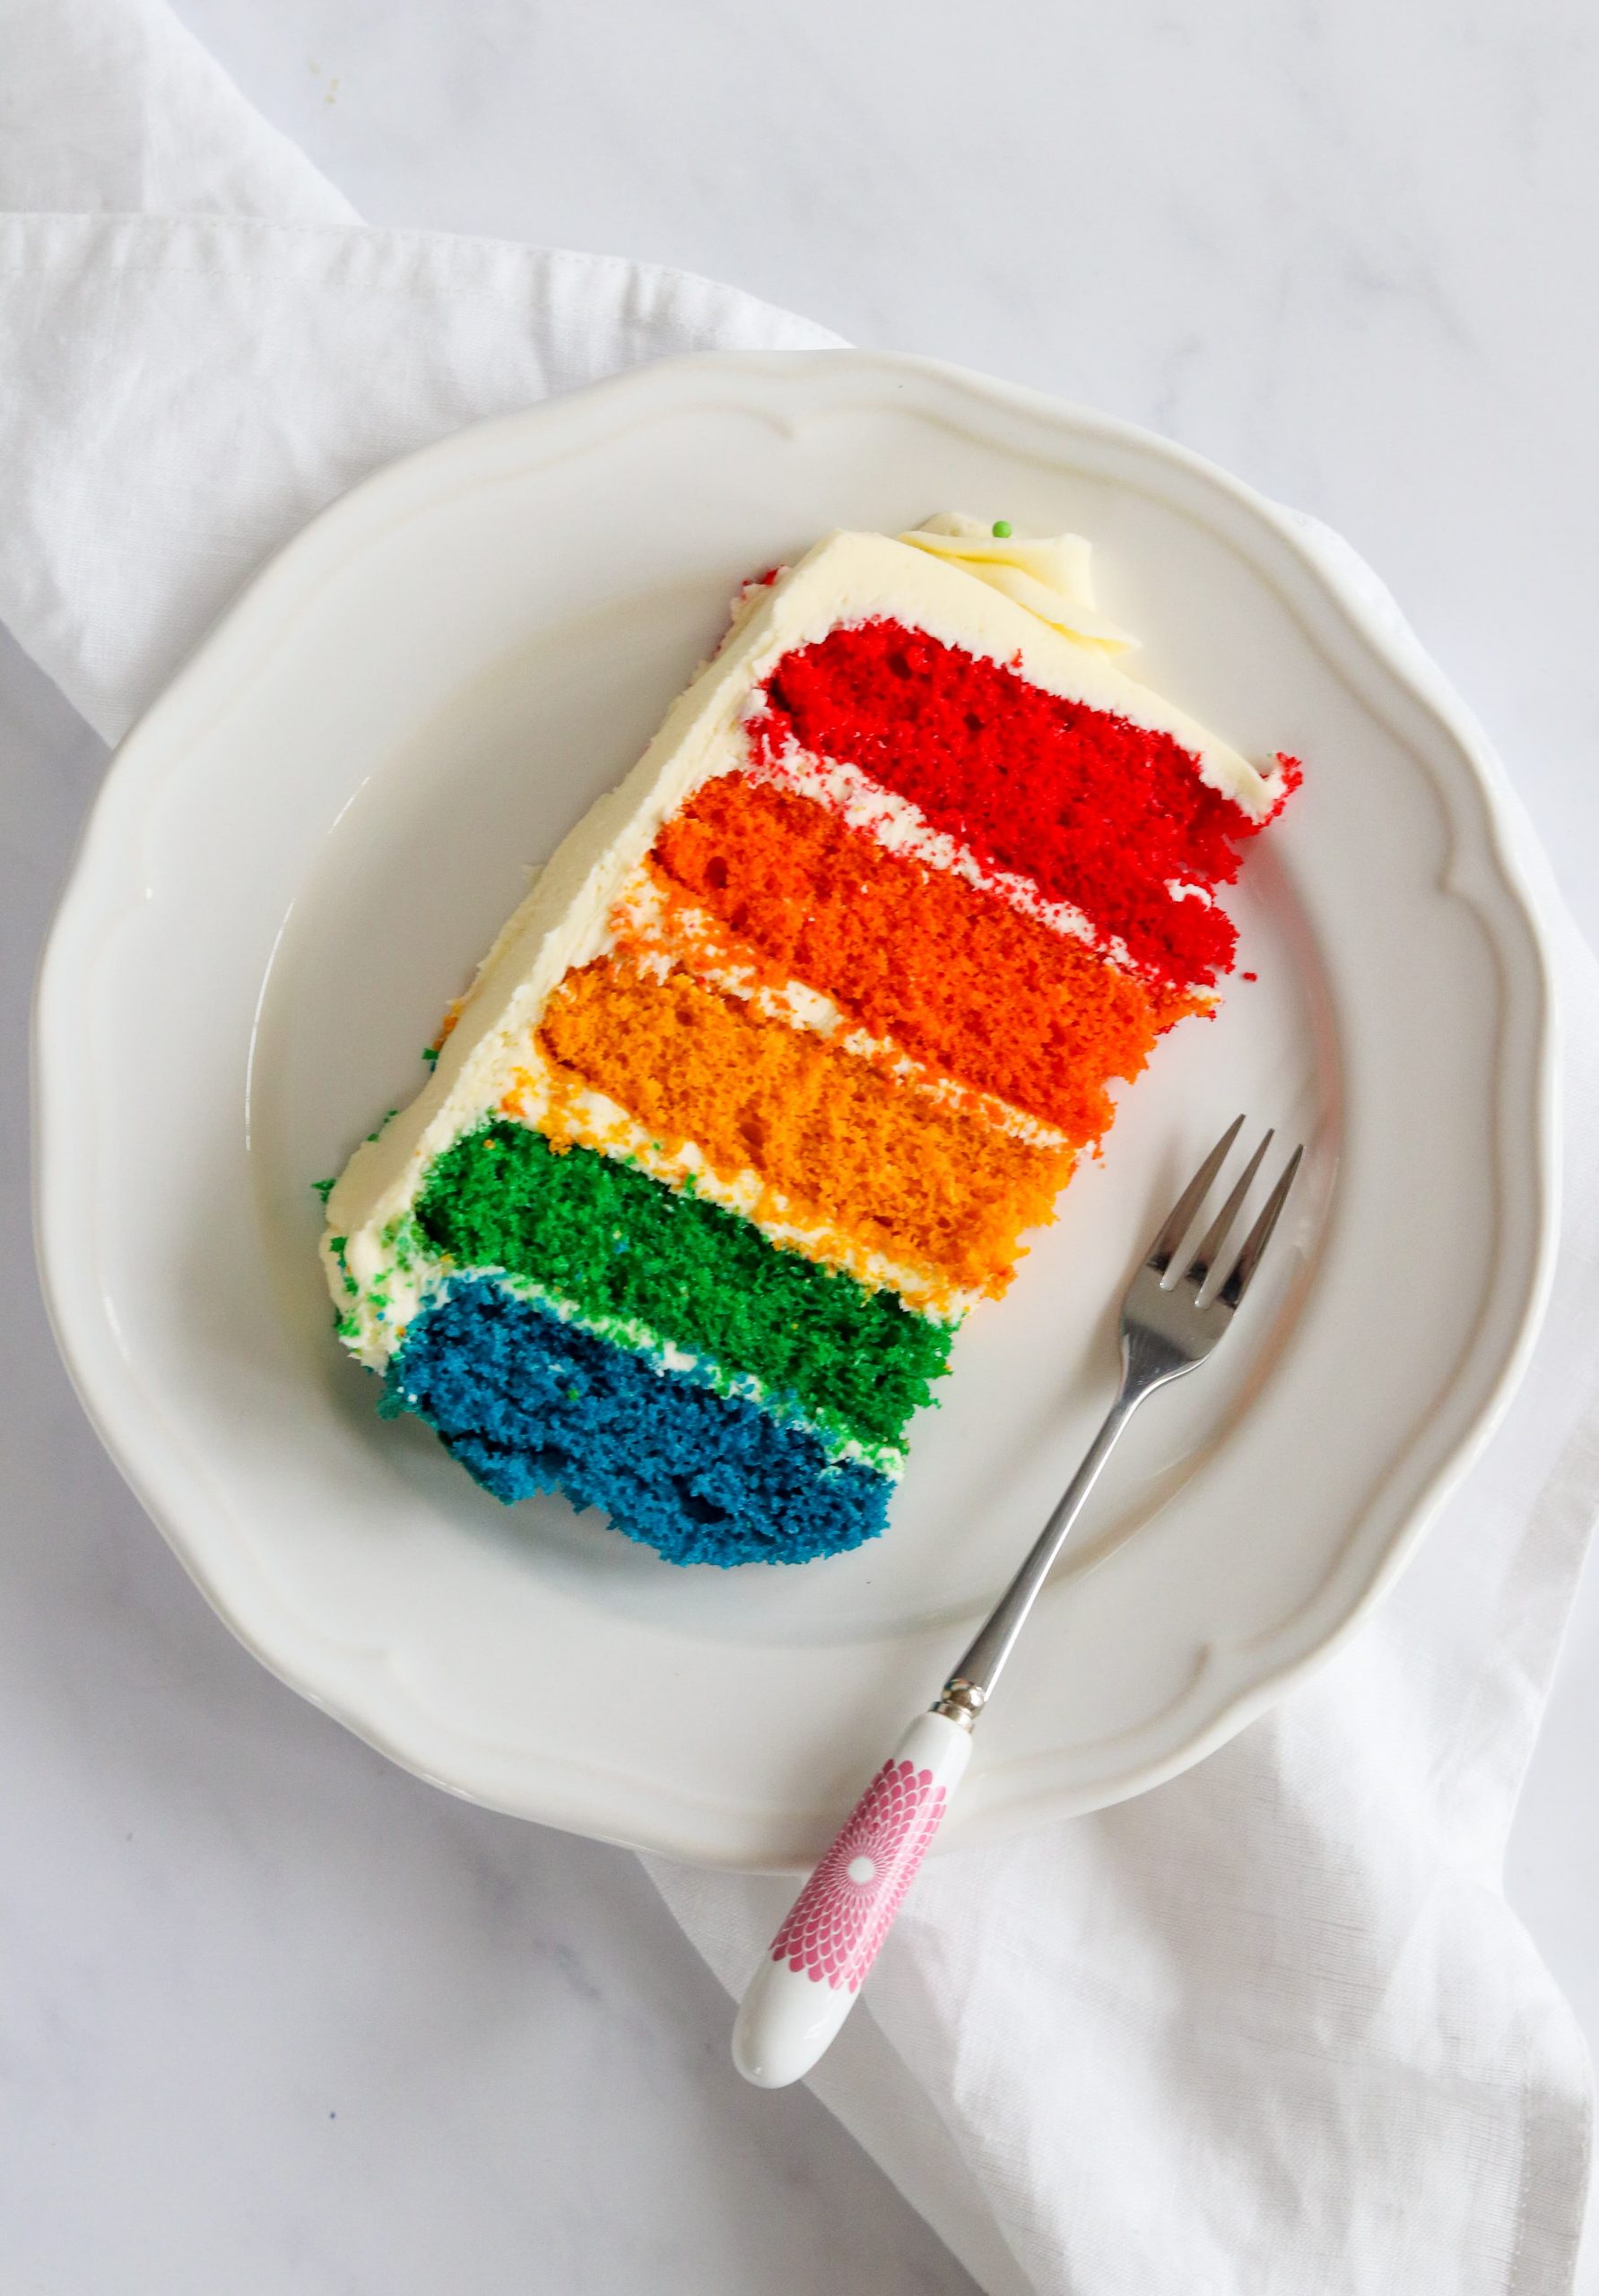
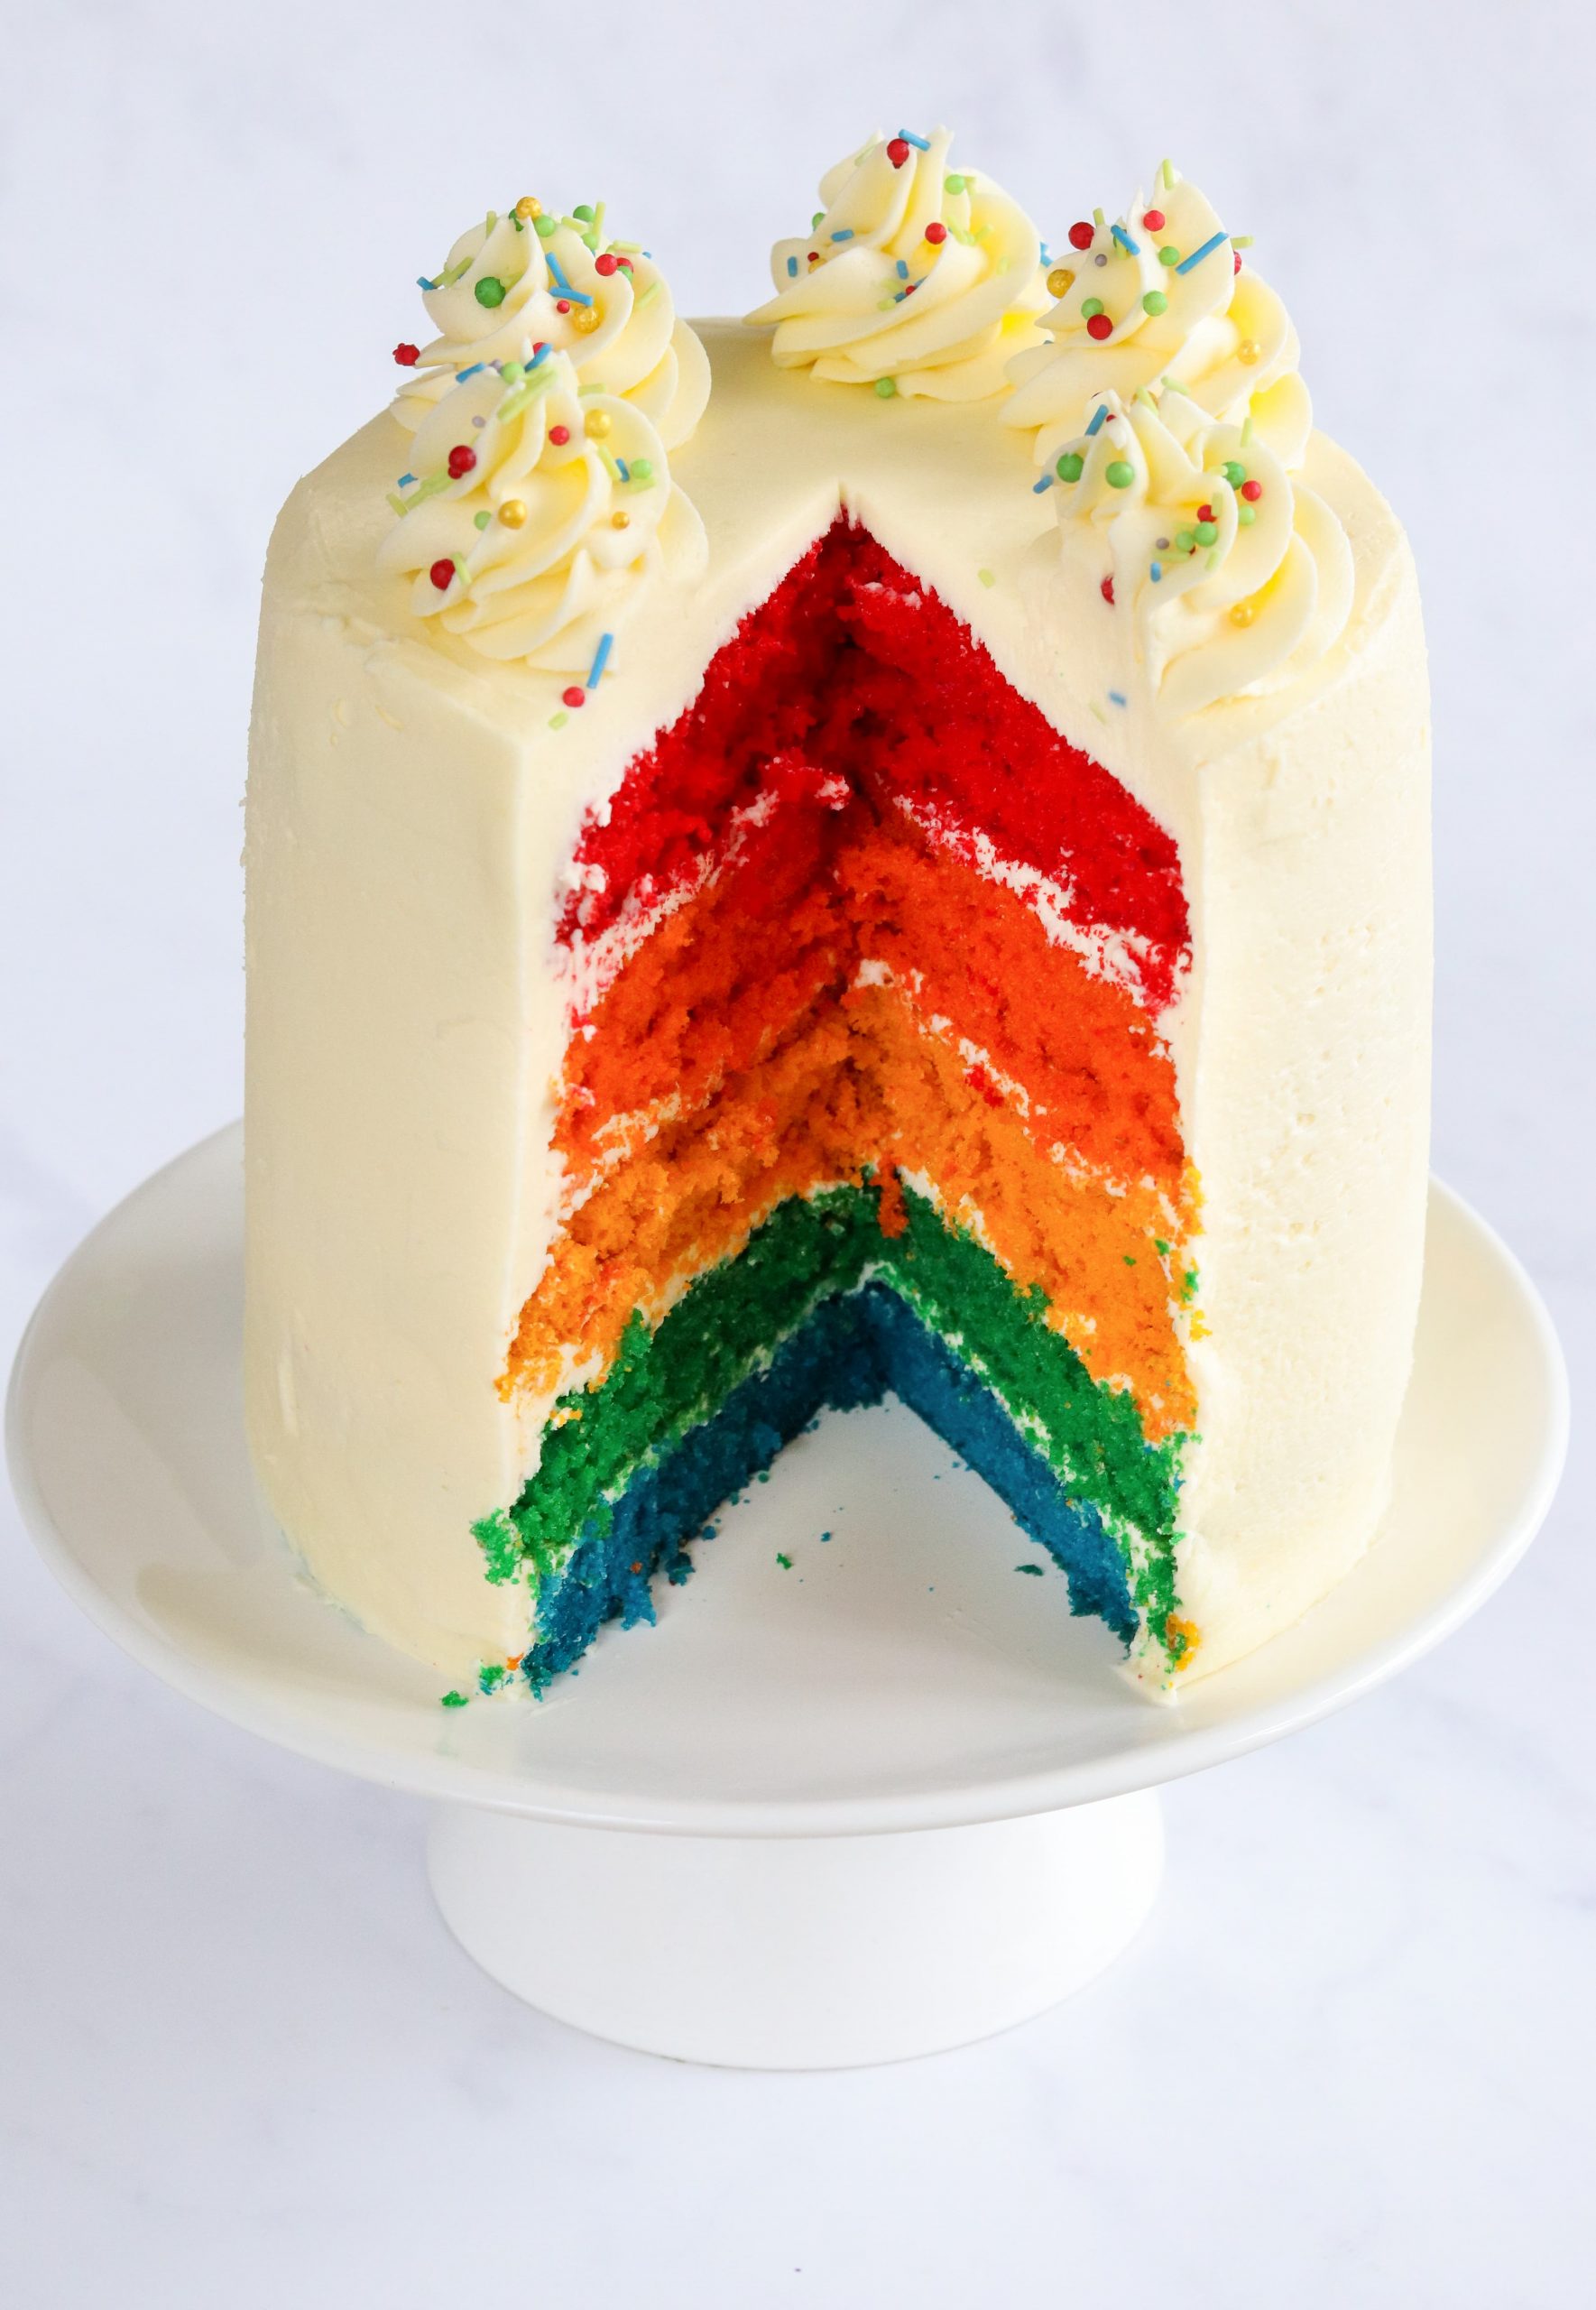
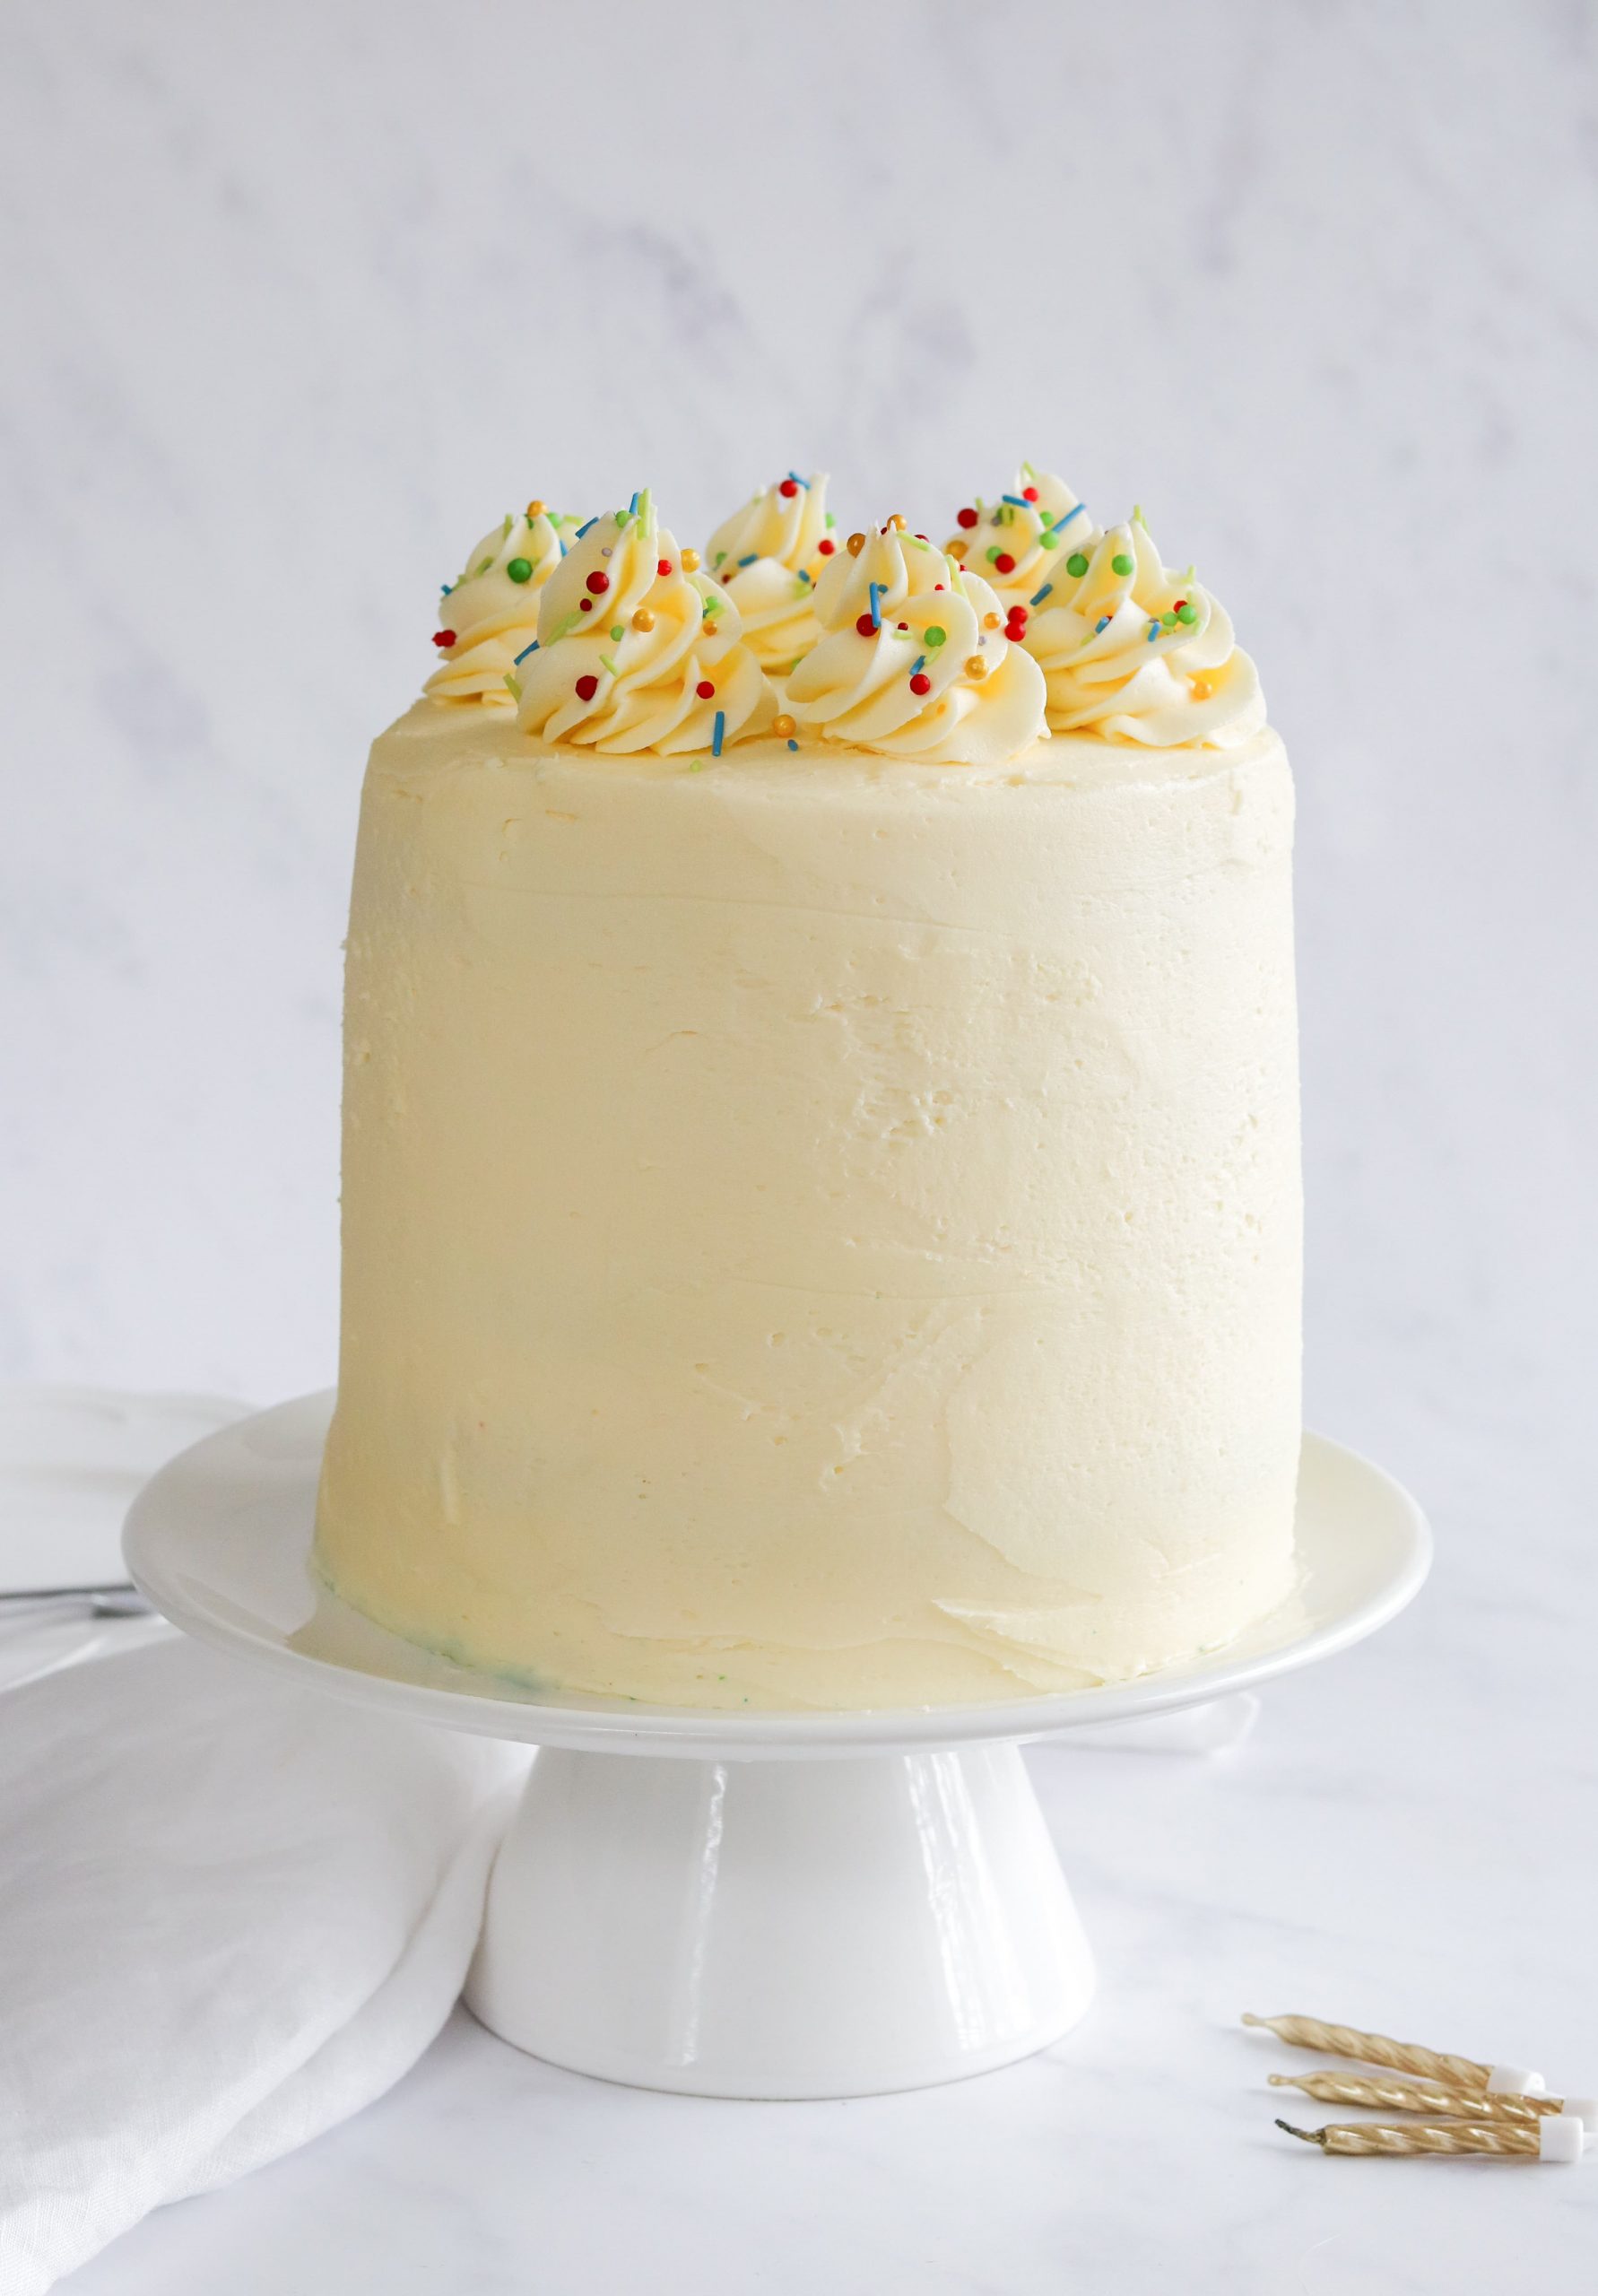
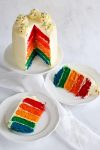
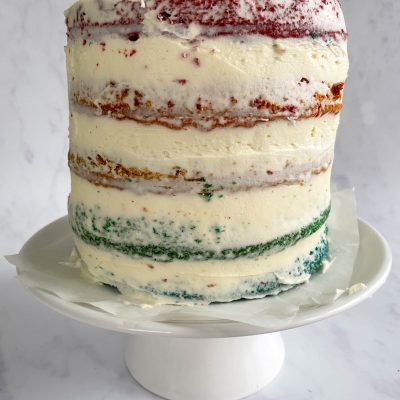
Unassuming and simple from the outside, but when it’s cut into this Rainbow Layer Cake has the most amazing layers of colour. This cake really does have the wow factor!
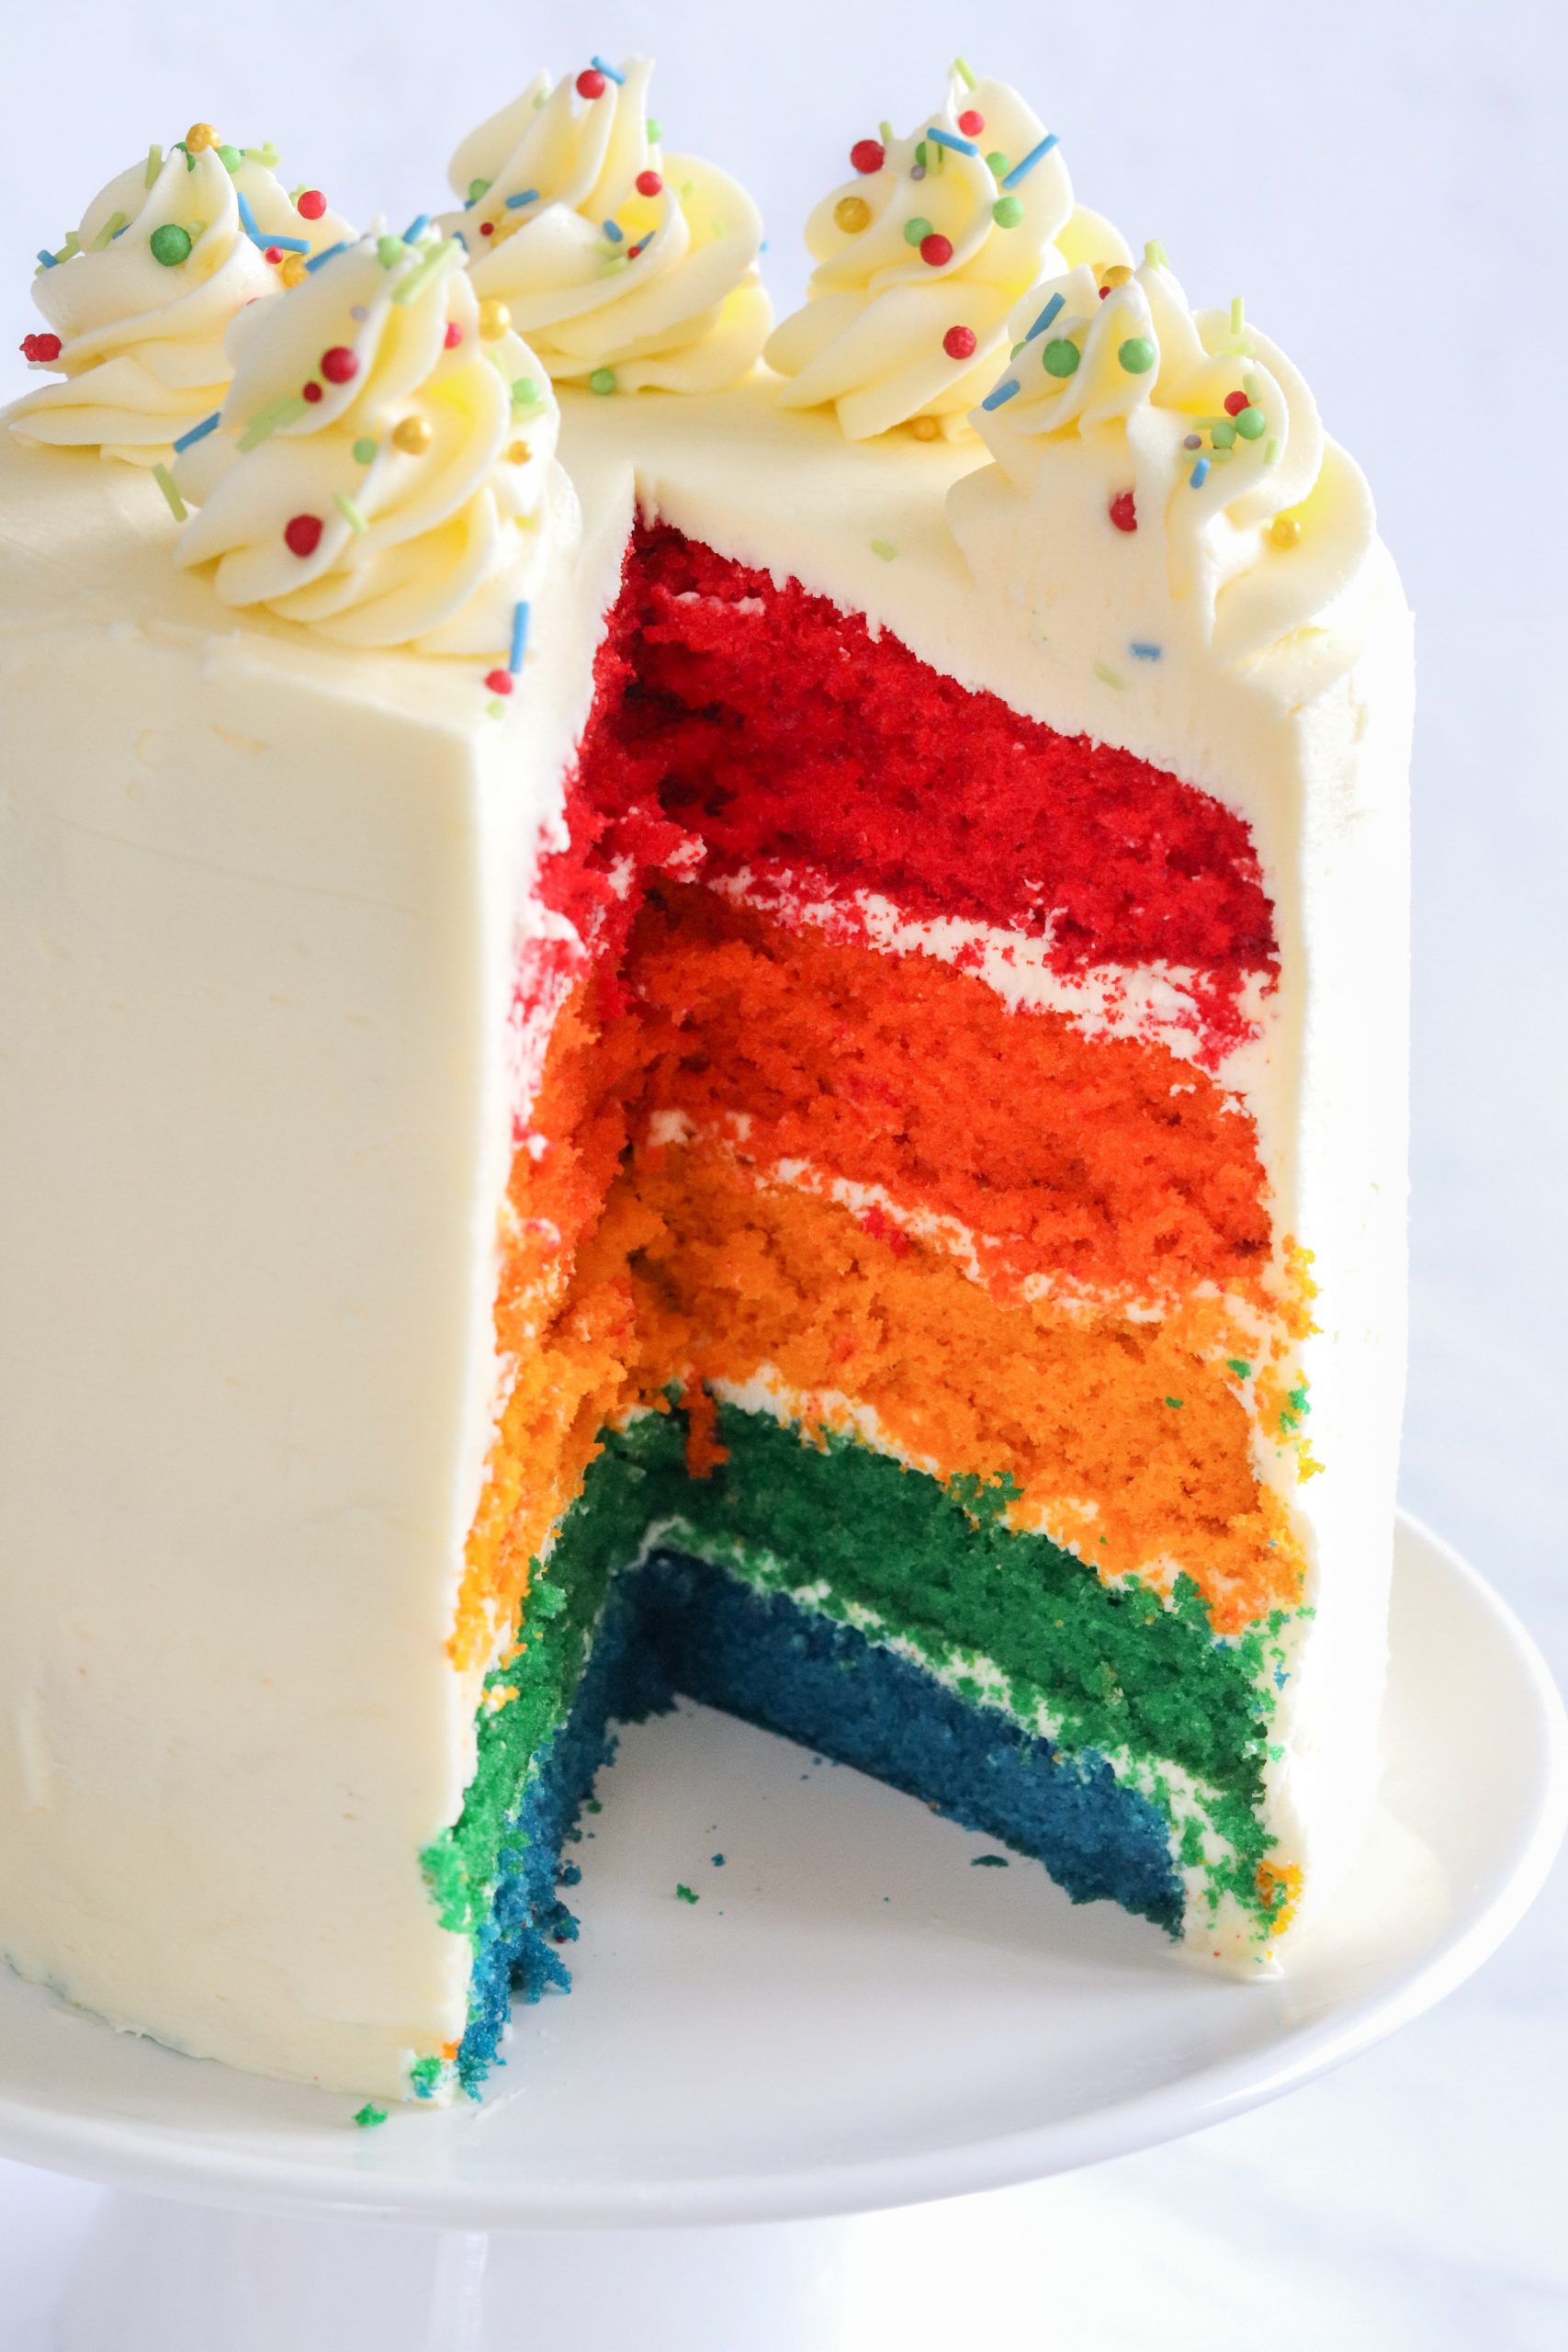
This Rainbow layer cake is a real showstopper
If you are looking for a cake that is a real showstopper, this Rainbow Layer Cake is definitely it.
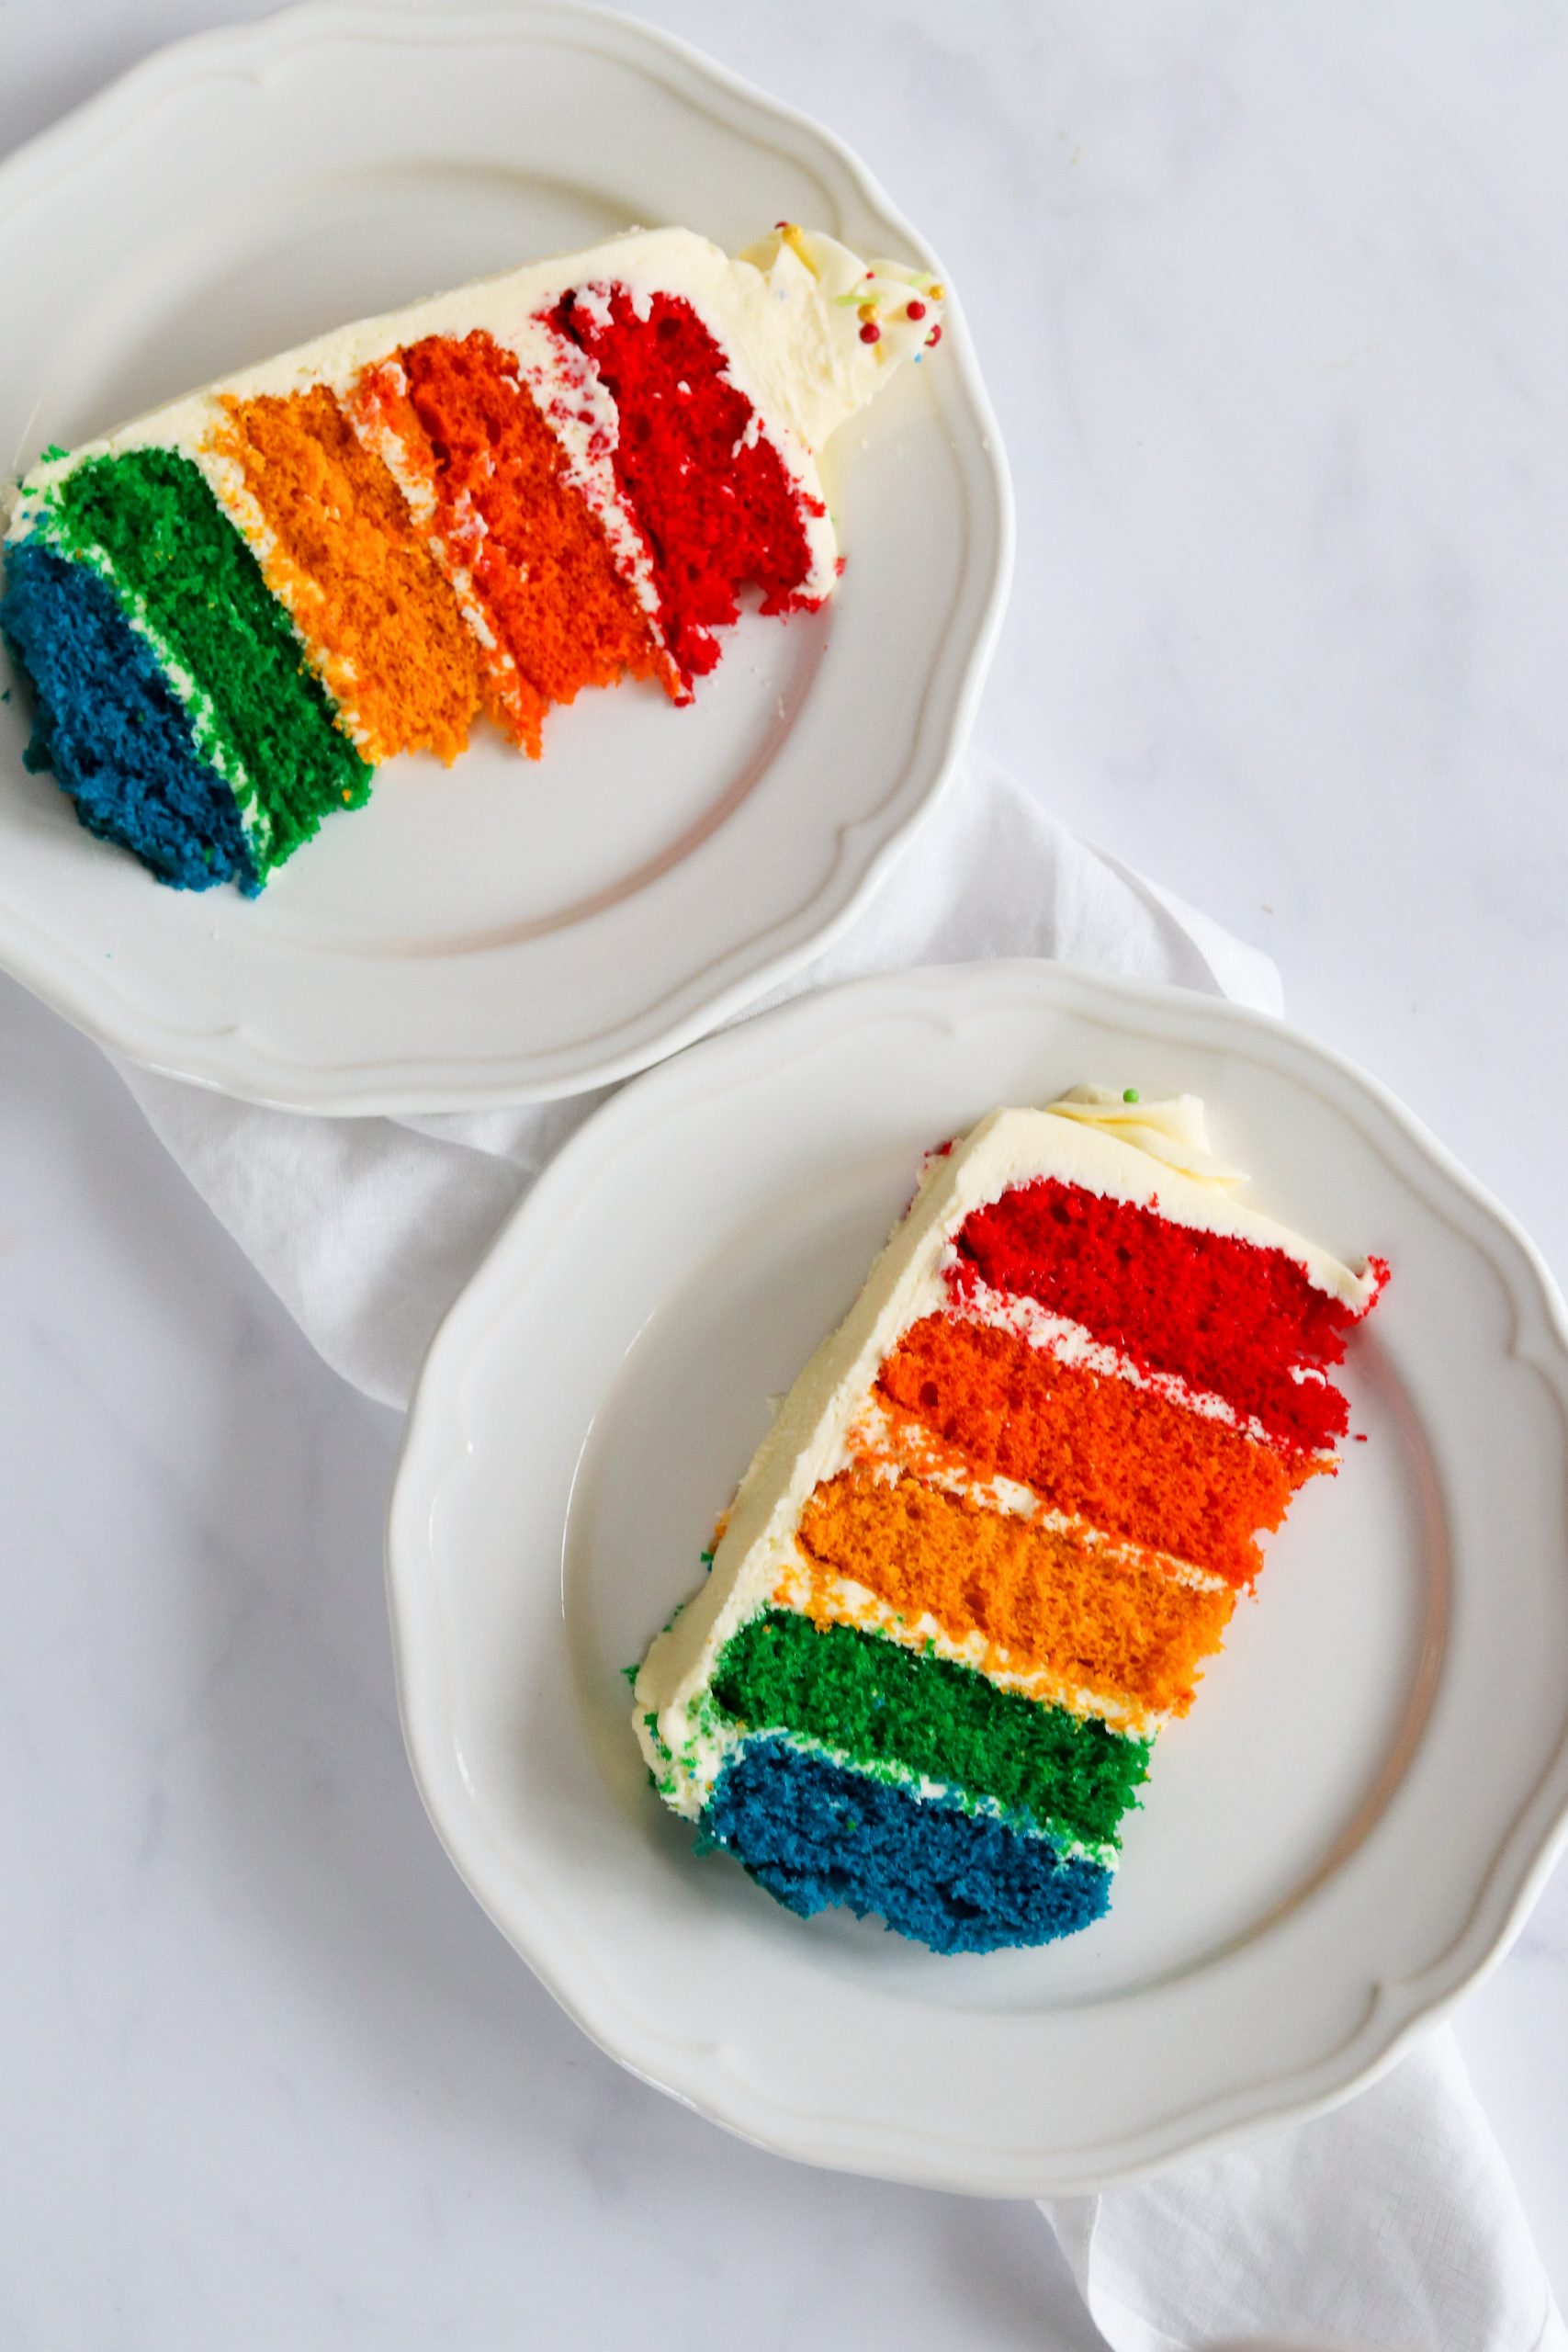
The different coloured layers will put a smile on anyone’s face! It is the perfect cake for birthdays; especially for children.
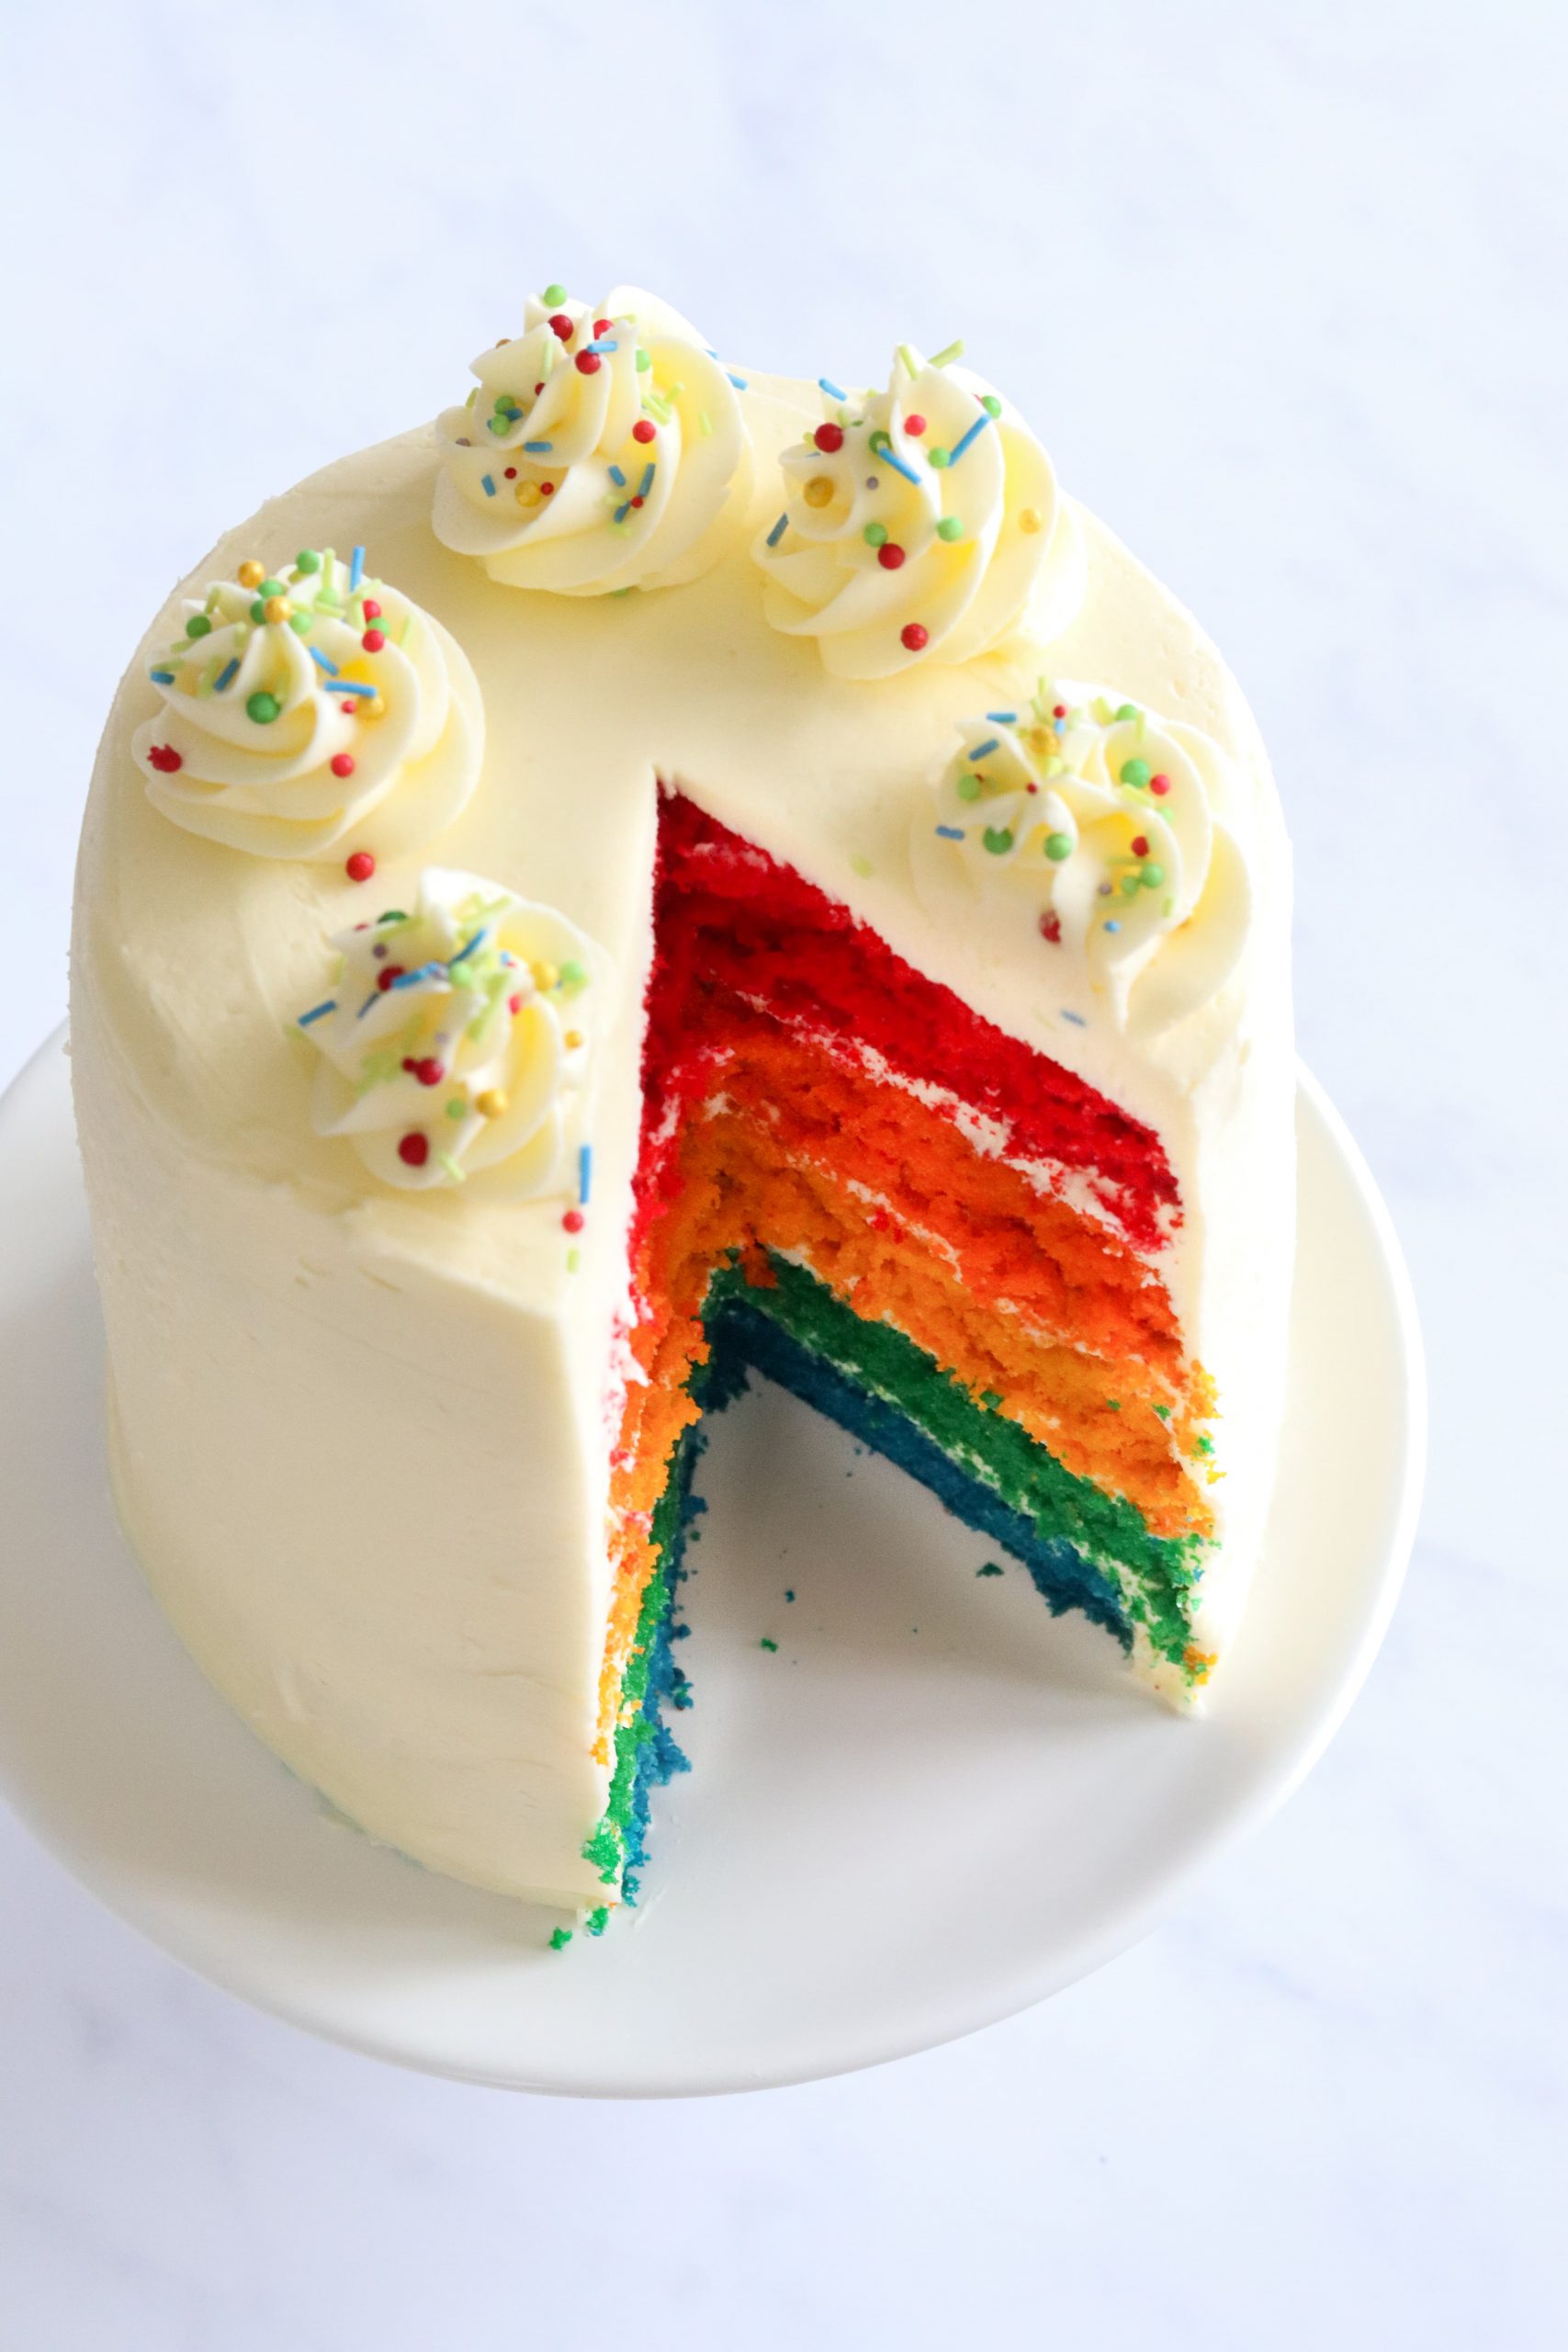
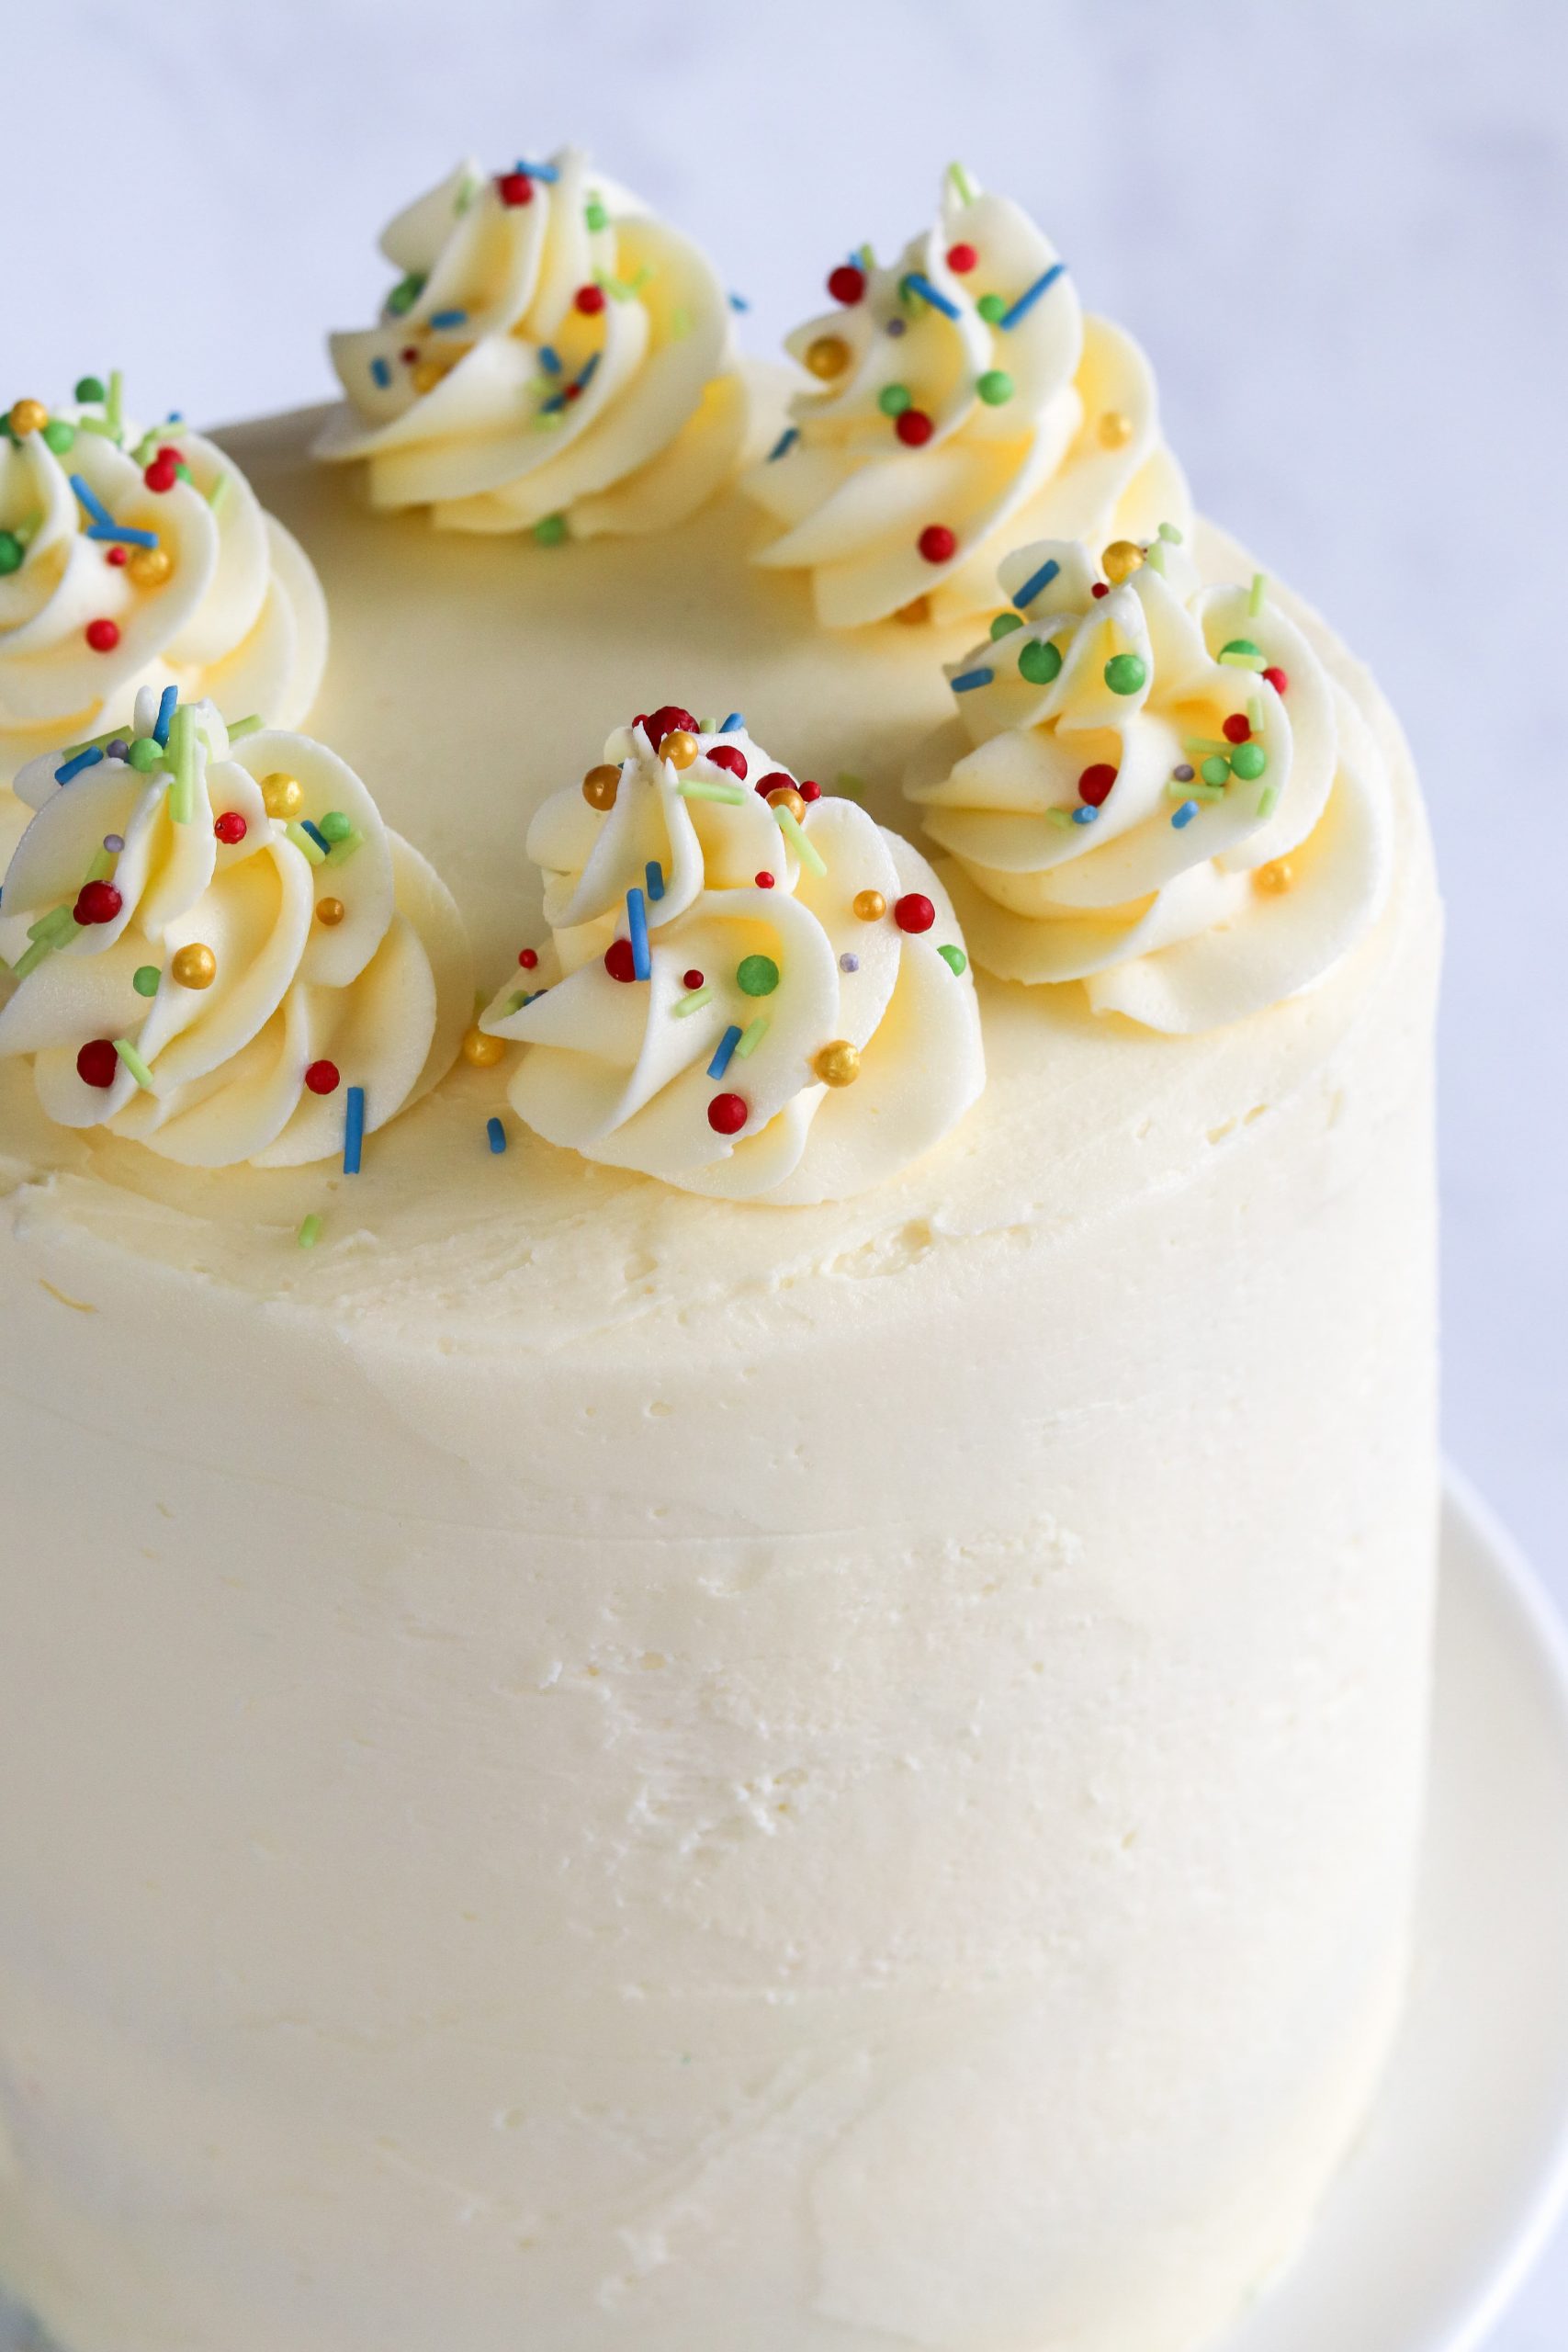
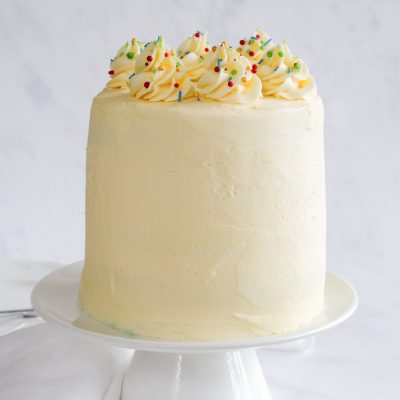
You can keep the decorations simple to compliment the bright and exciting inside; or go all out and decorate it however you like.
I was inspired by Kerry Cook’s for this recipe and tweaked her’s to come up with this Rainbow Layer Cake.
Don’t be intimidated by the rainbow!
You may look at this cake and feel slightly scared, but there is really no need to be! You need to make sure you have the right equipment and then you’ll be fine.
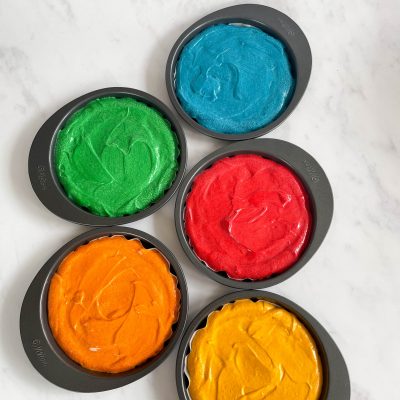
To make this cake as easy as possible, I bought the Easy Cake Layer Pan Set by Wilton from Lakeland. I’m sure there are plenty of places you can buy them online.
One tip if you do buy these cake pans; do not believe them when they say they are non stick!
I stupidly believed that they were the first time I used them to make an ombre cake and ended up with some cake getting stuck to the pans.
I recommend lining the tins with baking paper to prevent this from happening.
Which size cake tins to use
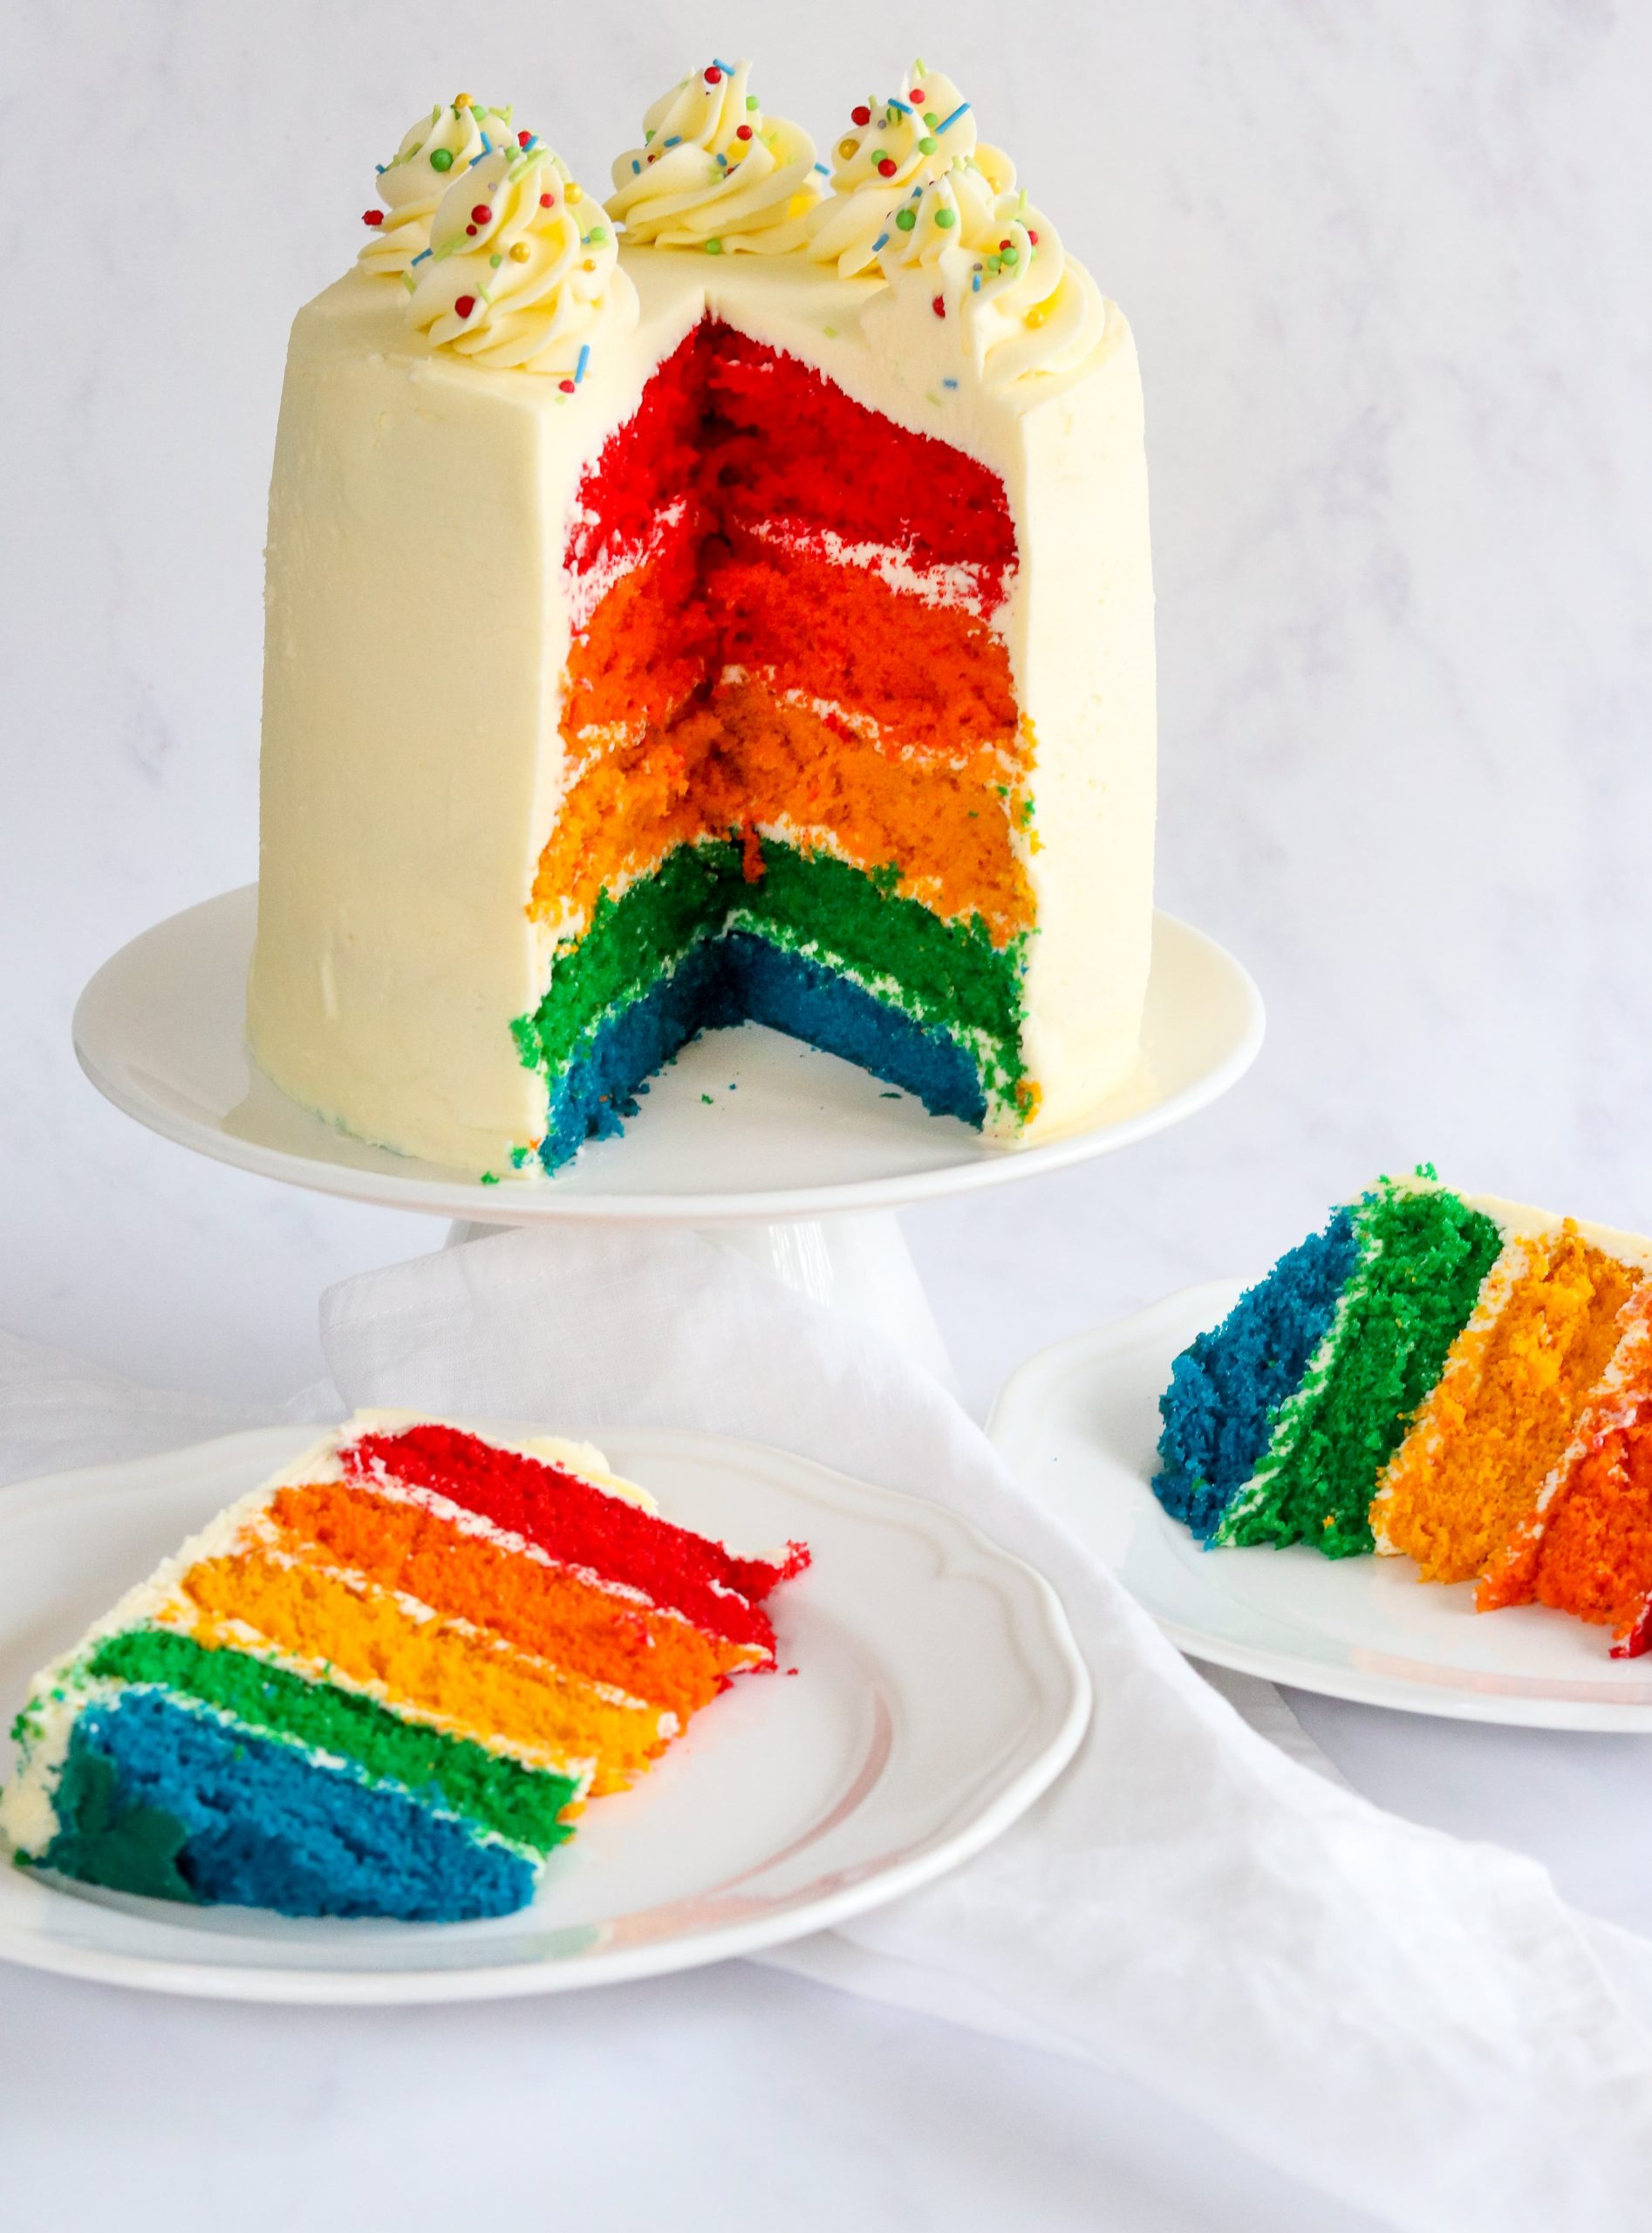
The cake pan set I use from Lakeland has five six inch cake tins. This creates a five layers of cake that are thick enough so that you will still see the colour when they are sandwiched with buttercream.
If you have six inch cake tins you can definitely use these. However I doubt you will have five unless you care a baker! So you might need to cake a couple of the colours and then wait and wash up the tins and bake some more.
If you don’t have six inch cake tins you can still make this cake! Most people will have eight inch cake tins so you can use these.
This will make thinner, wider layers of cake. They will also cook quicker because they are thinner. I would recommend checking to see if they’re cooked after 8 minutes and cook for a couple of minutes longer if needed.
How tall is this rainbow layer cake?
If you are using six inch cake tins then the cake will be quite tall! It is roughly 18cm (7 inches) tall when stacked so bear this in mind if you have to transport it anywhere!
If you use eight inch cake tins then the cake will be shorter. I haven’t made it with eight inch tins myself so I don’t know what it’s exact height would be.
Which food colouring is best to use?
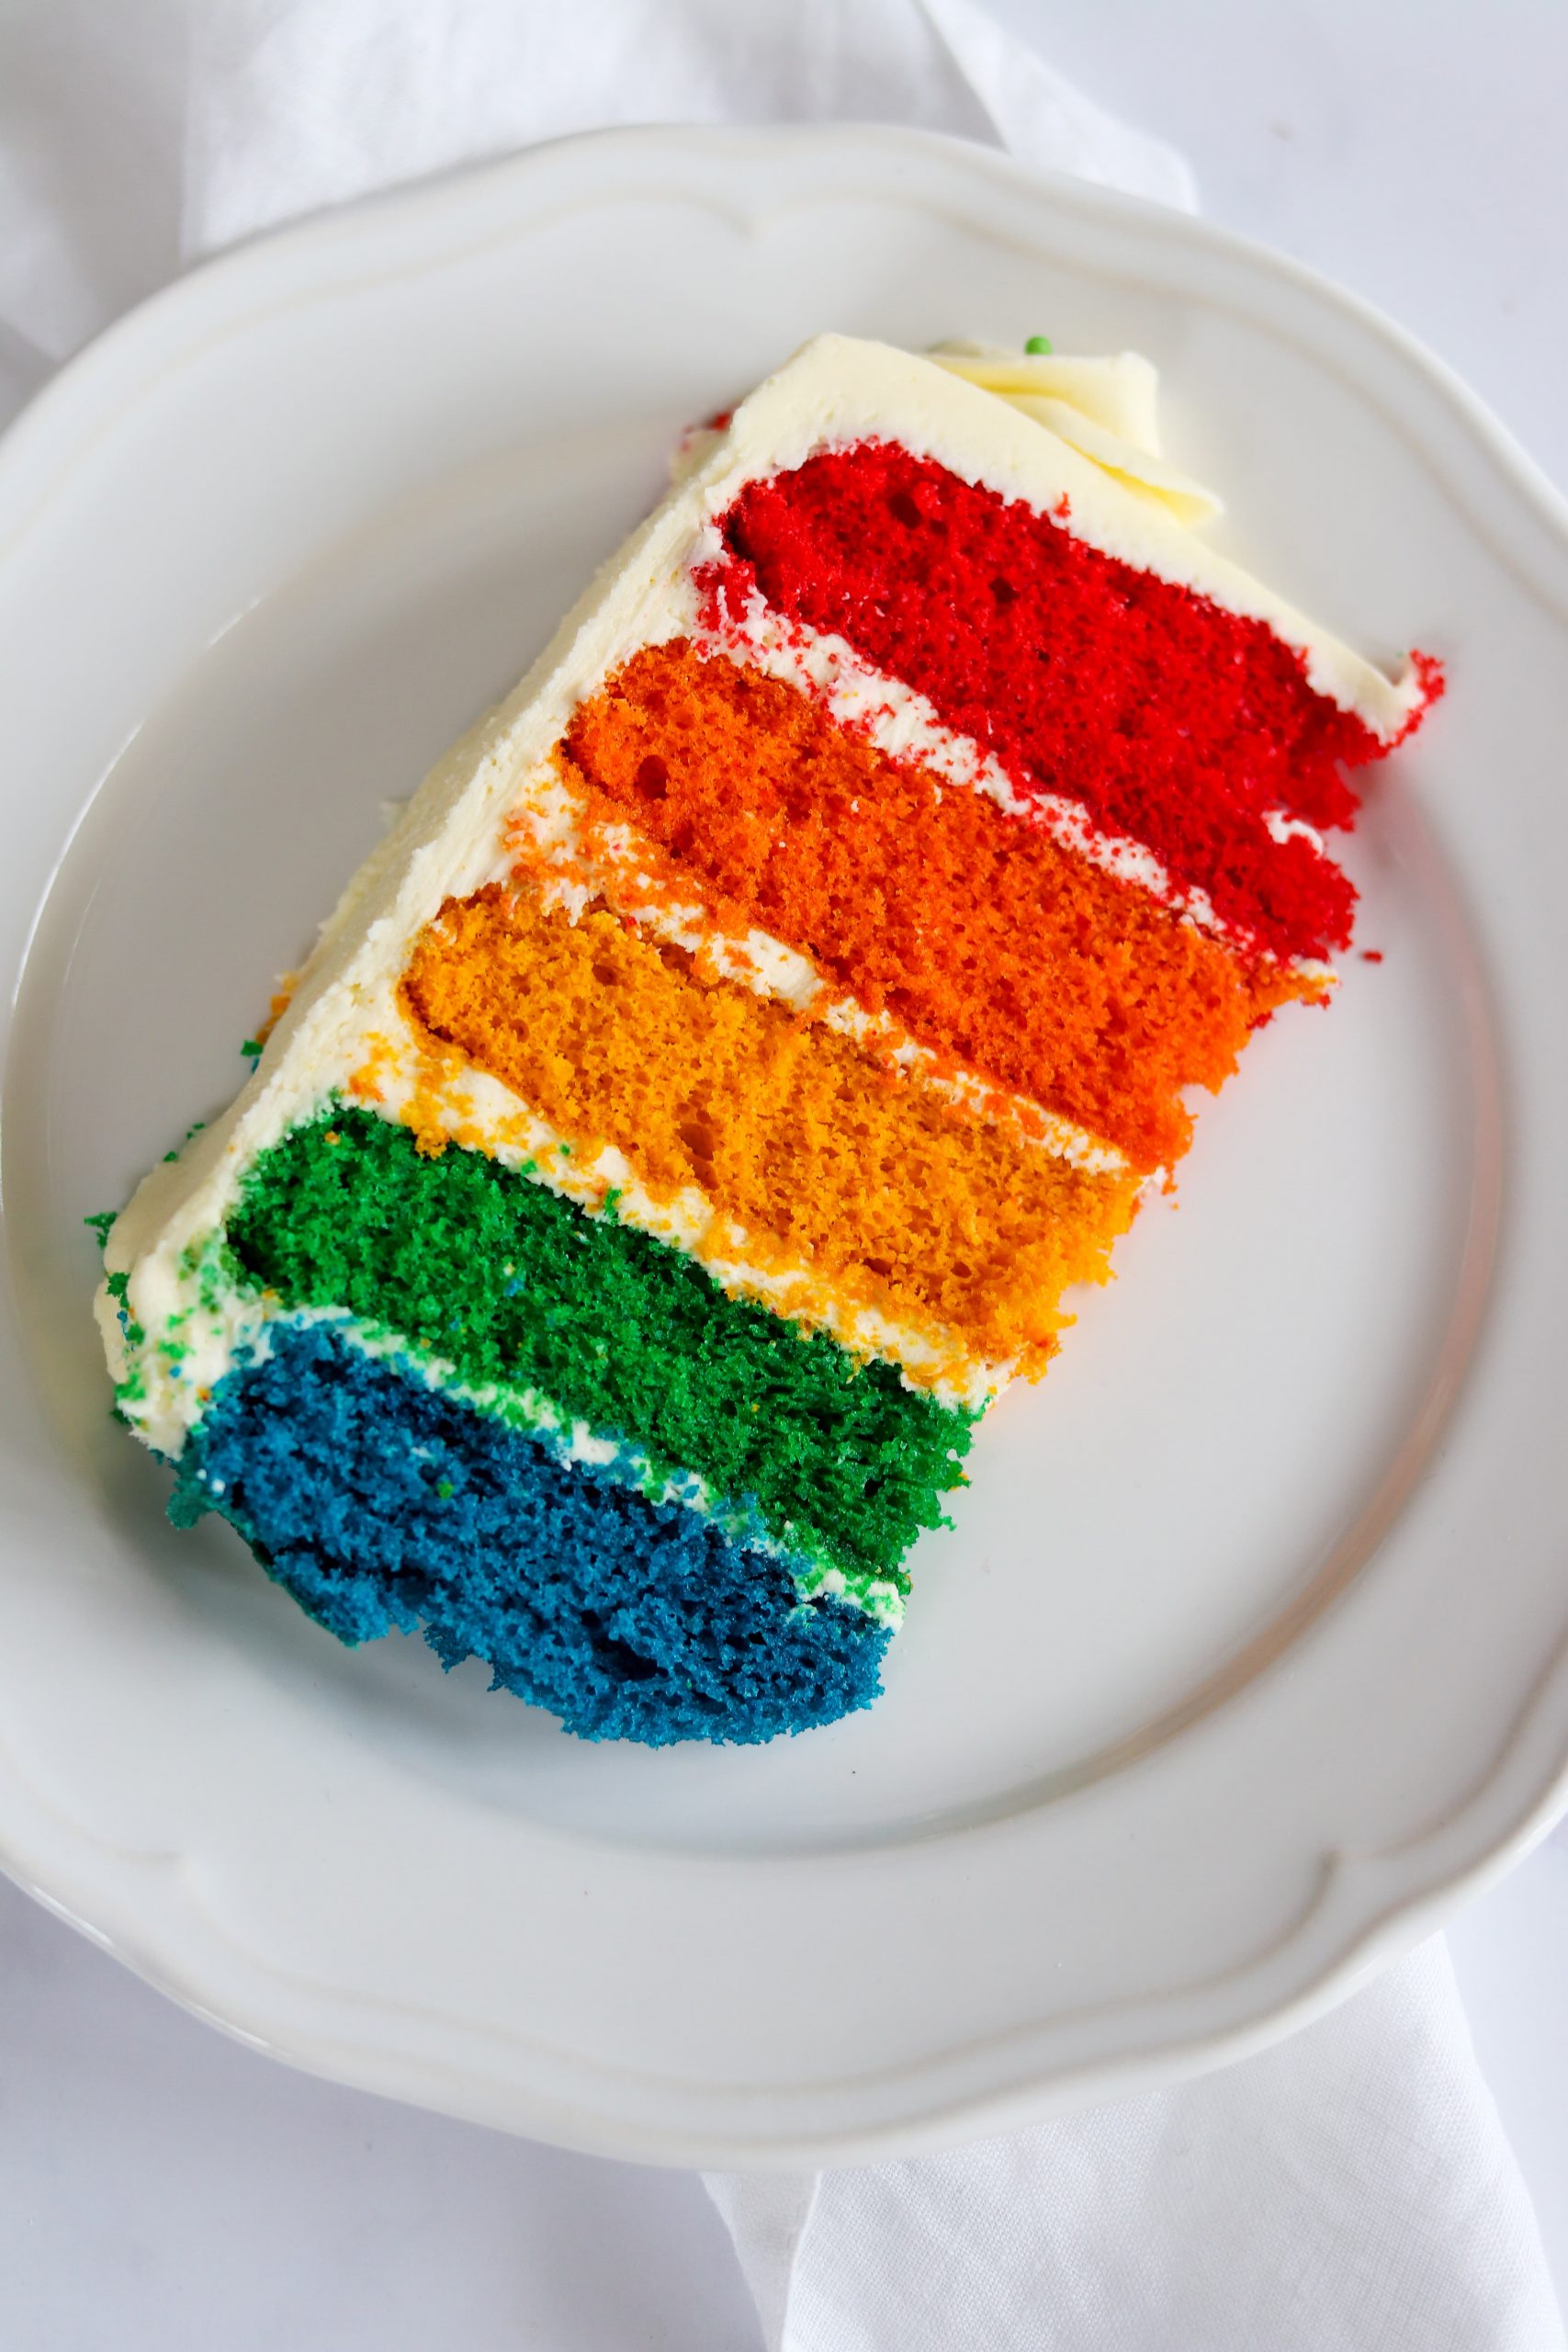
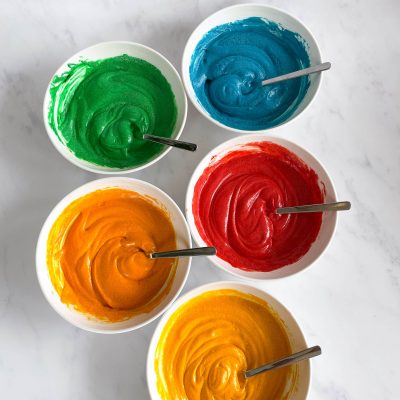
For something like this Rainbow Layer Cake, you need rich and vibrant colours.
I really wouldn’t recommend using the liquid food colourings that you can usually find in supermarkets. They just won’t give you the vibrant colours you need and you’ll probably use most of the bottle.
It is the gel food colouring that you need to look out for. A lot of large supermarkets have started stocking a few gel food colours.
I think the best place to buy these is online or in shops like Lakeland and Hobby Craft. I have used WIlton and Colourflair brands before and would recommend both.
Tips for baking a Rainbow Layer Cake
Before you start making the cake, weigh the bowl you will be using.
Once you have made the cake batter, weigh the bowl again and minus the weight of the empty bowl. Then divide this number by five and this is the amount of cake batter you need to spoon into each cake tin.
Some people may prefer divide the cake mix by eye, but I think it really is worth being as exact as you can. This gives the cakes the best chance to be even when they are baked.
Tips for decorating the cake
When it comes to icing cakes I think it is definitely worth investing in a cake turntable. This allows you to smoothly turn the cake backwards and forwards when you’re decorating it which is a huge help!
I also use a large off-set spatula to apply the buttercream to the cake holding it at a 90° angle. A spatula dipped in hot water and then dried is a great way of getting a smooth finish on your cake. There are lots of different techniques and ways people find help them, but this is what works for me.
Which food colouring is best to use?
For something like this Rainbow Layer Cake, you need rich and vibrant colours.
I really wouldn’t recommend using the liquid food colourings that you can usually find in supermarkets. They just won’t give you the vibrant colours you need and you’ll probably use most of the bottle.
It is the gel food colouring that you need to look out for. A lot of large supermarkets have started stocking a few gel food colours.
I think the best place to buy these is online or in shops like Lakeland and Hobby Craft. I have used WIlton and Colourflair brands before and would recommend both.
Tips for baking a Rainbow Layer Cake
Before you start making the cake, weigh the bowl you will be using.
Once you have made the cake batter, weigh the bowl again and minus the weight of the empty bowl. Then divide this number by five and this is the amount of cake batter you need to spoon into each cake tin.
Some people may prefer divide the cake mix by eye, but I think it really is worth being as exact as you can. This gives the cakes the best chance to be even when they are baked.
How to prepare the cake for decorating
When you take the cakes out of the oven they are unlikely to be perfectly flat. In order to get the best looking finished cake, I recommend levelling them.
I level cakes with a cake wire that you can set to the same height and use this for all of the cakes. If you don’t have a cake wire I would recommend using a serrated knife.
Make sure you take your time and cut off as little as possible to create a flat cake.
Tips for decorating the cake
To make sure you get the same amount of buttercream between each layer of cake, I like to use a piping bag. This means I can pipe an even layer of buttercream between each layer which will provide a better looking finished cake.
This cake requires a crumb coat to keep lock the crumbs in so they don’t get into the final layer of buttercream. This is just a thin layer of buttercream that doesn’t need to look pretty.
When you are applying the crumb coat, don’t dip your spatula back into the buttercream as you don’t want to get crumbs in the buttercream for your final layer.
When it comes to icing cakes I think it is definitely worth investing in a cake turntable. This allows you to smoothly turn the cake backwards and forwards when you’re decorating it which is a huge help!
Can I flavour the cake?
If you want to flavour the cake and or the buttercream you can do.
I prefer to leave it vanilla flavoured because this makes most sense to me. I don’t know what flavour I would use for a rainbow cake to not make it confusing.
If you flavoured it with lemon I think this would be confusing when eating the colours that weren’t yellow. But maybe that’s just me!
I would recommend adding any jam or curd between the layers as this would distract away from the coloured sponge layers.
Other recipes you might like
- Funfetti Cake
- Unicorn White Chocolate Rocky Road
- Raspberry & Mascarpone Layer Cake
- Nutella Swirl Cake
- Strawberries & Fresh Cream Cake
Pin for later

Rainbow Layer Cake
Unassuming and simple from the outside, but when it's cut into this Rainbow Layer Cake has the most amazing layers of colour. This cake really does have the wow factor!
Ingredients
For the cake
- 225 g margarine
- 225 g caster sugar
- 4 large eggs
- 2 tsp vanilla extract or vanilla bean paste
- 225 g self-raising flour
- 2 tsp baking powder
For the buttercream
- 420 g unsalted butter
- 840 g icing sugar
- 4-6 tbsp milk
Instructions
-
Preheat the oven to 160°C (fan assisted, 180°C non fan). Line your 6″ cake pans
-
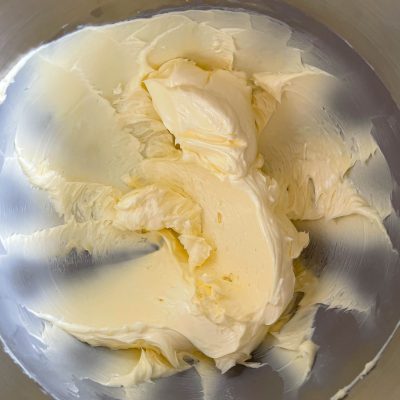
Add the butter and sugar to your bowl and cream until light and fluffy
-
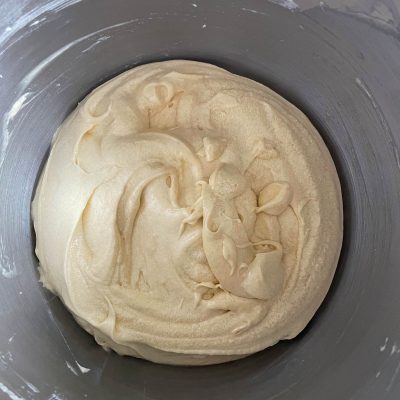
Add the eggs one at a time starting on a low speed and increasing it after each egg has been added. Add the vanilla and mix again before finally adding the flour and baking powder
-
Split the cake mix equally into 5 different bowls. Add a different colour of gel food colouring to each bowl
-
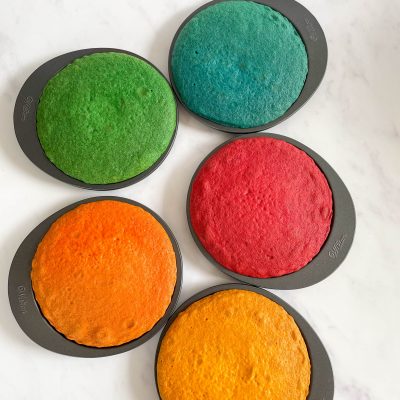
Pour each bowl of coloured cake mix into your prepared tins and bake in the oven for 10-15 minutes. They’re done when a cocktail stick comes out clean
-
Allow the cakes to cool slightly in the pans before turning out onto a wire rack and let them cool completely
-
Once completely cooled, level the cakes if needed so that they stack more evenly. You’re looking to take the smallest amount of cake off to make the cake flat
-
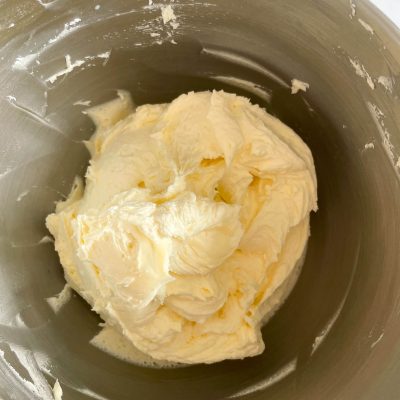
Mix the butter and icing sugar together until pale and smooth. Add enough milk until it is a smooth spreadable consistency
-
Starting with the blue layer, place one layer onto your cake board and then add a generous layer of buttercream. Repeat with all 5 layers
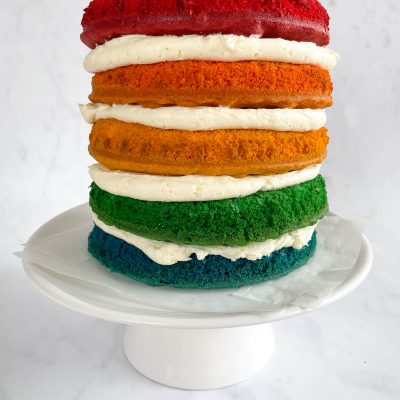
-
Once all of the layers are stacked, it is time to apply the crumb coat. Do this by applying a thin layer of buttercream to cover the whole cake. At this stage it doesn’t have to look pretty. After you’ve applied your crumb coat, but in the fridge for at least 30 minutes for it to set slightly
-
Once the crumb coat has become firm to the touch, you can now apply the final layer of buttercream. Make sure you use quite a generous amount of buttercream and take your time!
-
You can decorate the cake however you would like. I chose to keep it completely plain on the outside and made some bunting to stick in the top
Recipe Notes
To evenly divide the cake batter between the pans, weigh your bowl when it is empty. Then when you have mixed the cake batter, take the weight of the empty bowl away from the full bowl’s weight. Then divide this by 5 and this is the amount to put in each tin.
To level the cakes I use a cake wire. If you don’t have a cake wire I would recommend using a serrated knife. You are looking to take off the smallest amount of cake to make them flat.
For the crumb coat, use a small amount of buttercream to lock in the crumbs. It doesn’t have to be neat. Remember not to put any spatulas etc you have used back in the buttercream as this could mean crumbs get into the buttercream for the final coat.
Nutritional information is given as a guide only and may vary.
Sharon says
What a great cake, Cat!!!
Coincidentally, I was looking at the Wilton pan set in Lakeland Milton Keynes only yesterday afternoon. I was really good though and resisted the impulse purchase, but I think this post is a sign I should buy them 🙂
2 quick questions for you, if you don’t mind:
– How tall was the finished cake?
– How many servings did you get?
Thanks
Sharon
Cat says
Thank you 🙂
That is the exact shop I was in and got drawn into buying it! You should definitely buy them, they make this recipe a lot easier and I don’t think they’re a bad price at all.
The cake was roughly 7″/18cm tall which was a pain as it was slightly too tall for my cake carrier! This meant transporting it in the car a little nerve wracking!
Normal sized slices maybe 14ish? We had 8 slices then I think there was just under half the cake left which we left with my boyfriend’s family.
Thanks for stopping by 🙂 x
Betty says
I made this yesterday!
http://imgur.com/a/uiMK7
I was truthfully really nervous about it since there were no ratings or any reviews, but i think it turned out okay : )
My pan was like 8 inches or something so the layers were much thinner than yours, more like pancake-width than actual cake layers LOL.
I was going to do do this frosting recipe: http://iambaker.net/the-perfect-crusting-buttercream/ , but i think i failed that miserably, i don’t have crisco shortening here in australia, so i used butter… But i did follow your buttercream recipe for the outside, and it covered it perfectly! I could have made the colours a little bit more vibrant, but i think it’s fine : )
One thing i must say for anyone else trying this though; it’s extremely sweet, i had already shortened the caster sugar off and the confectioner’s sugar down a bit, but it was so sweet. I had one slice and i was done for the night; I will make this again, but it does take a long time, since i only have 2 baking pans.
Overall, the inside looks amazing~ and i think this was a success! <3 Thank you~
Cat says
Hi Betty!
That looks great! Thanks for sharing your photo!
Haha, yes unfortunately I’m quite a small blogger so my posts don’t always have comments like the more popular bloggers. I do try to include as much detail and as many photos to show exactly how I have made a recipe which I hope helps.
Although like you said your layers are slightly thinner, they are still really well defined. I think your colours look great, especially the red and blue 🙂 You could always use make a pastel rainbow cake too!
Ooh I’ve never even heard of that frosting recipe so I’ll have a look.
From what I can tell Crisco is the equivalent of something called Trex here in the UK (not that I’ve ever used it). I think (but not completely sure) that is a vegetable version of lard? Which if it is is slightly strange to use in buttercream?
I agree with it being sweet, but I think that might be because I’m not a fan of buttercream! When I’ve made this cake I’ve had no complaints though 🙂
Oh wow, I bet it did take a while then! If you do plan on making it again, you could see if anywhere with you sells a similar set of pans like I used here. The one I bought wasn’t very expensive and made it a lot easier and quicker!
Thank you for stopping by and commenting and I’m glad you liked it 🙂 x
Steph foster says
Hi! I had my first attempt at a rainbow cake today! So the cake part came out great, which I wasn’t expecting (because I had to divide the mixture by sight!) but I made cream cheese frosting and it wasn’t enough, and I was a bit confused about how much you put on the crumb frosting part?! Could you share your cream cheese ingredients?
The recipe was great for the cake 🙂
Cat says
Hi Steph,
Really glad the cake turned out well 🙂
The crumb coat is a really thin layer which is there to bind the crumbs to the cake so they don’t interfere with the final coat. You will still see the colours of the cake through the crumb coat.
Hope this helps x
Ruthie B says
Thank you so much for this recipe! I had the Wilton 5 layer cake pan set but didn’t come with any recipes and could never quite work out the right quantities for it but this worked out perfectly! I didn’t rainbow colour mine, just kept it vanilla sponge with coloured buttercream in my layers but went down a treat!
Don’t know if you still post recipes yourself but would you have happened to do one with this pan set for chocolate cake?? Thanks so much x
Curly says
Hi Ruthie,
So glad you like the recipe, even without the rainbow colours. I have a chocolate cake recipe coming soon that I think might work with these pans. I haven’t tried it, but I think the quantities should work out.
Sheri says
Hi, I made this cake for my sons first birthday today and it gets the thumbs up from us!
Really easy to follow and a great result. I would attach a pic if I knew how!!
Thank you, will definitely make again.
Sheri
Cat says
Hi Sheri,
That’s great to hear, glad you liked it!
I’d love to see the photo – you could send it to me via any social media (all of my links are at the top of my home page) or I could give you my email address?x
Sheri says
If you could give me your email address that would be great and I’ll send some pics x
Leora says
Hi 🙂
I’m on my second go at this, it’s baking now so hope it turns out well. What food colouring did you use? My first batch was liquid food colouring and it was awful, made the cake taste bad and could hardly see the colour. 2nd batch is dr otker gels and colour looks much better (at least in the batter) plus no bad taste!
Thanks for the recipe!
Leora
Cat says
Hi Leora,
I use Wilton gel colours (http://www.amazon.co.uk/Wilton-Colour-Icing-Set-226/dp/B005UOG942/ref=sr_1_1?ie=UTF8&qid=1457963968&sr=8-1&keywords=wilton+food+colour+gel). They are a thick gel and a little goes a long way.
How did your cake turn out? x
Lisa west says
Hello
I was wondering if I used the bigger 20cm Lakeland tins
How much should I increase your ingredients by?
Thanks
Lisa
Cat says
Hi Lisa,
The quantities in this recipe would make 2 20cm cakes. These would be quite thick though so depending on how thick you want each layer you could split it into 4 tins for a thinner layer and cook for maybe 15 minutes. x
Valerie Behrens says
Hello Lisa,
If I make the cake layers in advance and freeze them til the “day of” the birthday…then assemble & frost it…would it be LESS good?
Thanks!
Valerie
Curly says
Hi Valerie, if you wrap them really well they should be absolutely fine. I always try to bake the cakes the day before I’m assembling them but I realise this isn’t always possible.
Mrs Miriam Harding says
How far in advance can I make this cake? Was hoping to make Friday, buttercream and fondant icing either Saturday or Sunday, for party on Tuesday. Is that too far in advance? And how can i store it?
Did a trial run with this recipe today, really yummy
Curly says
Really pleased you like it! I think that would be slightly too long. I’d worry that the cake would start to become dry by then. Before the cakes are frosted I would wrap them in cling film or store them in an airtight tupperware. But once they are iced it would be tricky because the cake was too tall for my cake carrier and a box wouldn’t be airtight. If you could make the cake on Sunday I think it would be fresher.
Nicoletta Mythillou says
Hello i intend to make the cake as a teo tier cake. Would the recipe be ok for stacking and covering with fondant ?i intens to use the wilton 6 inchoans fir the top tier.Thank you
Curly says
Hi Nicoletta. I haven’t tried this myself but it is a fairly sturdy cake. It will be absolutely fine to be covered with fondant. It is quite a tall cake already so it sounds like you are making a monster! I would make sure you put plenty of dowels in the bottom layer to reinforce it so it holds the weight of the top tier. I would also put a cake board (or clean piece of cardboard) between the two layers to act as more support. It will be pretty special looking finished cake!
Nicoletta Mythillou says
Thank you very much for your instant reply and your advice !I think you are right ptrobably illbe use using 2 or 3 of the pans to make sure.
Curly says
You’re more than welcome 🙂
Jenny says
So glad I found your recipe. Made for my sons 1st birthday with help from my 5 year old!! So easy to do and the outcome is amazing!
I added gold cake glitter spray and stars to the outer buttercream layer!!
Thank you!!
Curly says
I’m so pleased you liked it and that your 5 year old could help too! Wow sounds like it was a lovely cake 🙂
Aliya says
Hi Curly
Thank you for sharing this recipe! I’ve made the impulse buy of these cake tins too to make for my sons 2nd birthday. I’m not the best baker so I’m nervous how it may turn out!
Can I ask – I never know which brand butter to buy for my buttercream? I always find the baking ones too yellow in colour and I’m looking for that white/creamy colour you have.
Any recommendations would be great!
Thanks, Aliya x
Curly says
Hi Aliya,
I’m sure you will do a great job!
I tend to buy supermarket own brand butter and it doesn’t look too yellow as you can see. I find beating the butter really well before adding the icing sugar makes it lighter in colour which helps.
Another thing you can do is add whitening powder to make it lighter and more white. You can buy this online or in cake shops. You shouldn’t need to do this though.
I hope that helps 🙂 x
nic says
hi,
I haven’t actually made this recipe yet, but was just wondering… the pictures you have attached of the cake, the yellow and the orange look the same colour! Is there any way to avoid this?
Curly says
This is completely down to how you colour the sponge mix prior to baking. You can buy separate orange and yellow gel food colours and then add as much of each until you get the colours you like. Remember the colours need to be bright so they sponges keep their colour when they’re baked.
nicole says
Hi Cat
I made this recipe today for a english project- (might sound a bit weird)…I also used the 6 inch pans from Lakeland…and guess what… the cake blew everyone away!
Thanks so much for this recipe as all the other layered rainbow cake recipes I looked at, were not at all attractive!
nicole x
Curly says
Hi Nicole, I am so pleased the cake turned out so well and everyone loved it. Thank you 🙂 x
Helen says
Approaching this with a little trepidation: it is for my granddaughter’s 4th birthday. She wants the butter icing covered in 1000s and 10000s: any suggestions as to how I achieve this. Helebn
Curly says
Hi Helen, this isn’t something I have done before! you could gently try pressing them on. Hopefully this video will help – https://www.google.com/search?q=how+to+cover+a+cake+in+sprinkles&oq=how+to+cover+a+cake+in+sprinkles&aqs=chrome.0.0l8.5656j0j7&sourceid=chrome&ie=UTF-8#kpvalbx=_5JYgX_6_FZLYxgPe7bfoBg43
Sandy says
hi
Can I cover this cake in fondant icing or do u think it could collapse
I’m making it for my grandaughters 10th birthday on Friday ( at her request ) also with a sweetie centre like a piniata !
When should I start making the cake
Yr advice would be really appreciated
Thankyou
Curly says
Hi Sandy, I haven’t covered it in fondant myself but I don’t see why you couldn’t. It should just be the same as any other cake to cover. I hope it goes well and she likes it 🙂
Sandra says
Morning
thanks for yr reply
forgot to let me know if I could make the cake today ( mon) and leave the actual assembly till thurs for the birthday tea on Friday
Would it dry out if baked this far ahead..?
Wondered if should make a 6 layered 8 inch version as want to fill wth sweets
Would appreciate yr thoughts
Thankyou so much
Sandy
Curly says
Sorry Sandra! And sorry if I am too late, I have been out all day today. If the cake is for Friday and you are assembling it on Thursday, I personally would make it on Wednesday. The cake may be starting to get a little dry by Friday if you make it early. You also need to account for when the leftovers are going to be eaten. If you make it later in the week, it will be fresher and tastier for people to enjoy longer after the birthday tea.
You could make a 6 layer 8 inch cake, but that would be quite a lot of cake. I suppose it depends how many people will be eating the cake. I also haven’t tried that so wouldn’t know the exact quantities.
Claire says
Such a lovely but easy recipe. Used this to make my daughters first birthday cake but I changed the colours so it was a pink ombré effect. It turned out amazing and tasted delicious! The sponges were lovely and light too.
Curly says
Love that idea! So glad it turned out well and you both liked it 🙂
Rhiannon says
Hello Curly!
I’m planning on making this cake for my daughter’s 11th birthday. I was wondering whether it would be possible to use butter for the cake mix rather than margarine? I personally find margarine leaves a bit of an after taste that I’m not keen on (I have super sensitive taste buds!). If so would it be better to use salted or unsalted butter and would I use the same amount?
Thank you!
Curly says
Hi Rhiannon, absolutely you can definitely use butter and yes you would use exactly the same amount. I would always use unsalted butter because I prefer to use this in baking. Hope she likes the cake 🙂
Rhiannon says
Thank you so much for the reply! I will start the cake tomorrow and will let you know how I get on. Wish me luck!
Curly says
Can’t wait to hear, good luck!
Paula Curley says
Hi, glad I came across this recipe as I’ve bought these tins and it’s hard to come across a recipe. I have a fan oven, where are the 5 tins best placed in oven and do they need turned? I have used the tins once with a 8″ recipe and cakes came out baked/browned so unevenly. Oven temp was correct as I bought an inside oven thermometer.
Curly says
Hi Paula, I tend to put 3 on a tray in the middle of the oven and two on the shelf below. They shouldn’t need turning, but if you notice some are looking more brown on one side then I would recommend turning them. The cakes on the bottom shelf might need a couple more minutes to bake than the ones on the middle shelf.
Laura says
Thank you so much for the recipe. I made this as a birthday present during lockdown for my husband who I couldn’t treat to a meal out. As a novice baker who only occasionally makes a Victoria sponge, this was an epic challenge for me. It worked so well with all your tips about the right pans and colouring to use. I have a habit for not quite following things to the letter however your recipe was so well laid out and easy to follow. I’m super proud of the result. Thanks again!
Curly says
Oh I am so pleased you found it easy to follow and you liked it!
Chloe says
Oh wow – this is next level!
Curly says
It’s definitely a bit special!
Janice says
Thanks for the really clear instructions, this is such a special cake and a lovely surprise when you cut into it.
Curly says
Definitely a surprise! Thanks Janice!
Claire Denton says
Hi
I’m
Making this today for my daughters 7th birthday on Wednesday. I’m going to use 8 inch pans and I wondered about whether I should use the ingredients listed and then half again so that my layers aren’t too thin?
Curly says
Hi Claire, yes I think that would be a good plan. I hope it turns out well and she likes it 🙂
Katie says
Hi is it possible to make and freeze the sponge a week ahead? Thanks
Curly says
Hi Katie, yes you could definitely do this. I would thoroughly wrap each layer individually in cling film to keep them safe in the freezer.
Ruthy says
I absolutely love this cake recipe and have been using it for years for my home baking! Thank you so much for making it!
I have been asked to make my first ever marbled cake but I would love to use the same tins as in this recipe – any chance you’ve ever made a vanilla/chocolate marbled cake using them?? Not sure how I work out my ingredients.
Thank you !!
Curly says
Hi Ruthy, so pleased you like the cake! Sorry I haven’t made a marble cake before so I don’t know the measurements that would work I’m afraid.